
There’s a specific kind of frustration that comes with cooking in a rental kitchen. You set down a cutting board and suddenly there’s nowhere to put the onion. You open a cabinet and a saucepan lid slides out to greet your foot. The drawer that should hold utensils holds utensils, plus batteries, plus a takeout menu from a restaurant that closed.
The odd part is that most tiny kitchens aren’t actually out of room. Walk into one and you’ll see bare walls, empty cabinet doors, a gap next to the fridge, and shelves where everything sits in a single layer with a foot of air above it. That’s not a space problem. That’s unused space hiding in plain sight.
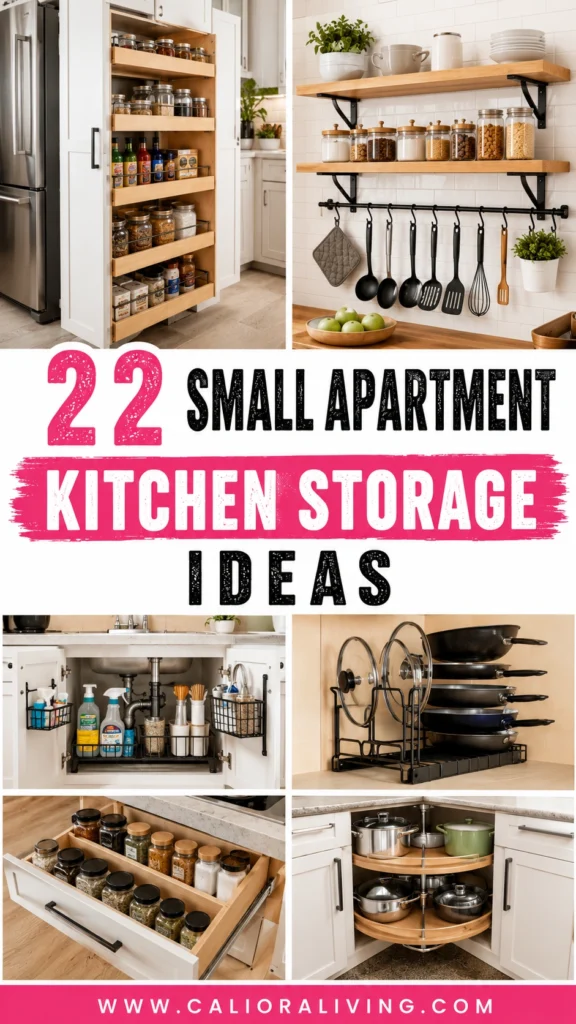
The 22 small apartment kitchen storage ideas below go after every one of those spots. All of them are renter-friendly, most cost under $30, and none require a conversation with your landlord.
1. Mount a Magnetic Knife Strip
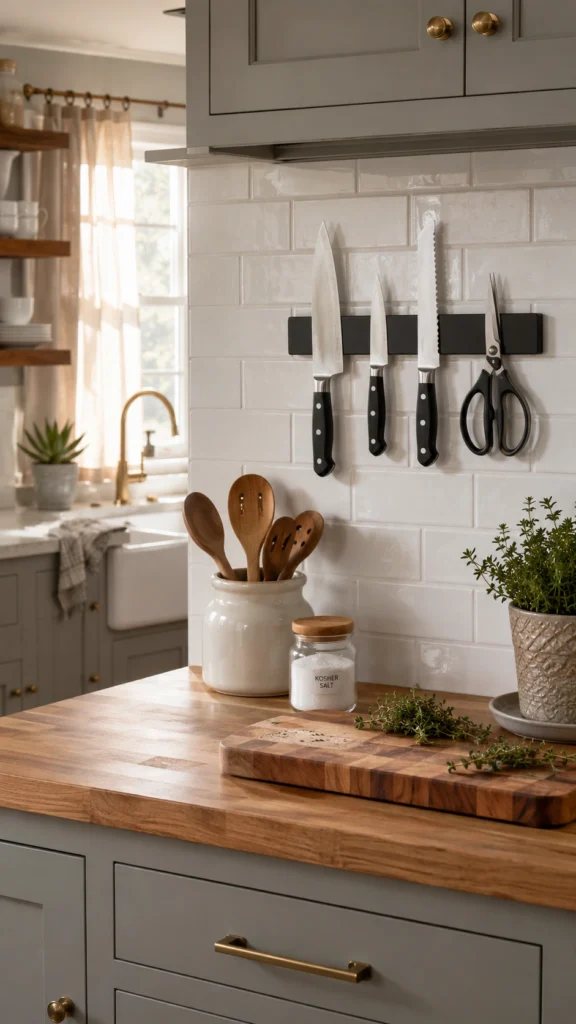
A knife block occupies a solid square foot of counter, and a knife drawer is mostly a way to slice your finger while reaching for a spatula. A magnetic knife strip solves both. Every blade goes on the wall where you can see it, and the drawer it used to live in opens up for something else.
Most strips cost $10 to $20 and mount with two screws or heavy-duty adhesive in about five minutes. There’s a bonus most people discover later: blades stay sharp longer on a strip because they’re not banging against each other in a drawer. Mount it at least 12 inches above the counter so tall bottles still fit underneath, and you’ll find it also holds kitchen scissors and the bottle opener that otherwise vanishes weekly.
2. Slide a Slim Rolling Cart Into the Fridge Gap
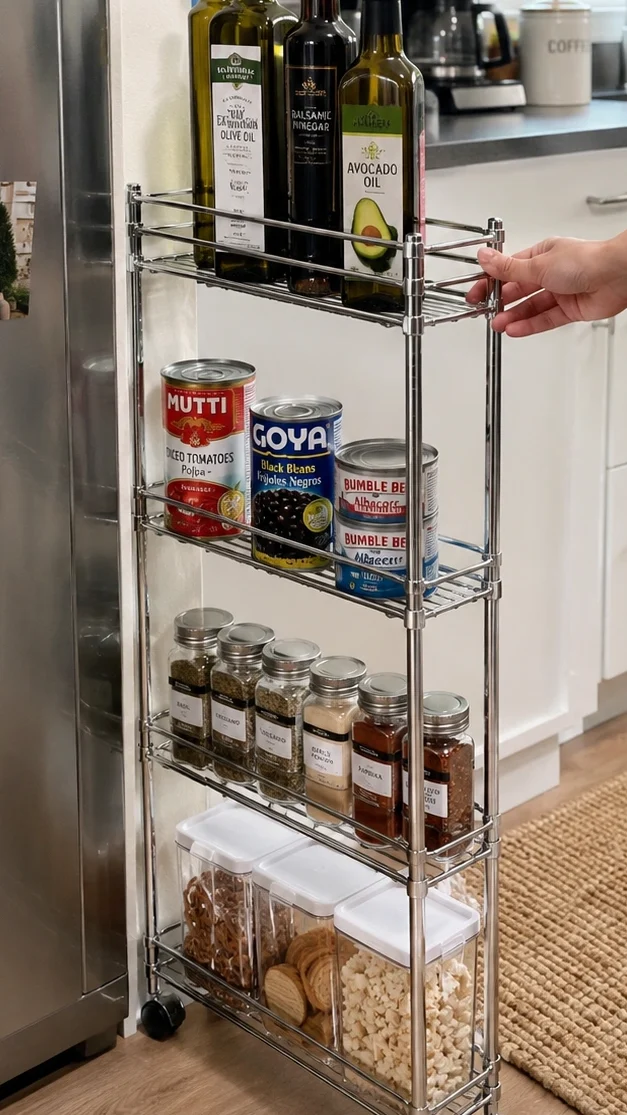
Go look at the gap between your fridge and the wall. Five inches, maybe six, holding absolutely nothing. A slim rolling cart turns that dead strip into a four-shelf pantry for oils, canned goods, spices, and snacks. Roll it out when you cook, tuck it back when you’re done.
The one mistake worth warning you about: people order the cart before measuring the gap. Carts come in widths from 4 to 10 inches, and half an inch too wide means it never leaves the box. Measure first, then spend $25 to $60, and favor a model with lipped shelves so bottles don’t shift while it rolls.
If your apartment has no pantry at all, and most don’t, this is probably the single most useful purchase on this list.
3. Hang a Pegboard on an Empty Wall
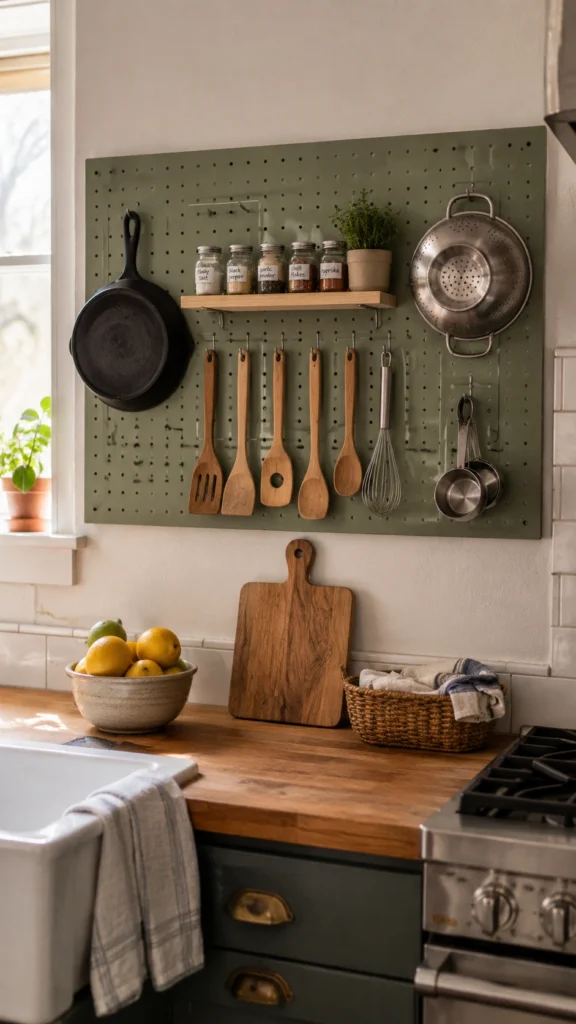
Professional kitchens have relied on pegboards for decades, and the reasoning holds up in a 40-square-foot apartment kitchen just as well. A 2×4-foot board with hooks handles pans, utensils, colanders, measuring cups, and even a small shelf for spices. When your cookware changes, you move the hooks. No other storage system adapts that easily.
A painted pegboard also reads as a design choice rather than garage hardware, so the kitchen gains character along with the storage. One habit worth borrowing from workshop owners: trace a light pencil outline around each item. Everything returns to its exact spot after washing, and the board stays orderly instead of drifting into chaos over a few months.
Not ready to commit to a full board? A $10 wire grid panel with S-hooks does most of the same work.
4. Add a Tension Rod Under the Sink for Spray Bottles
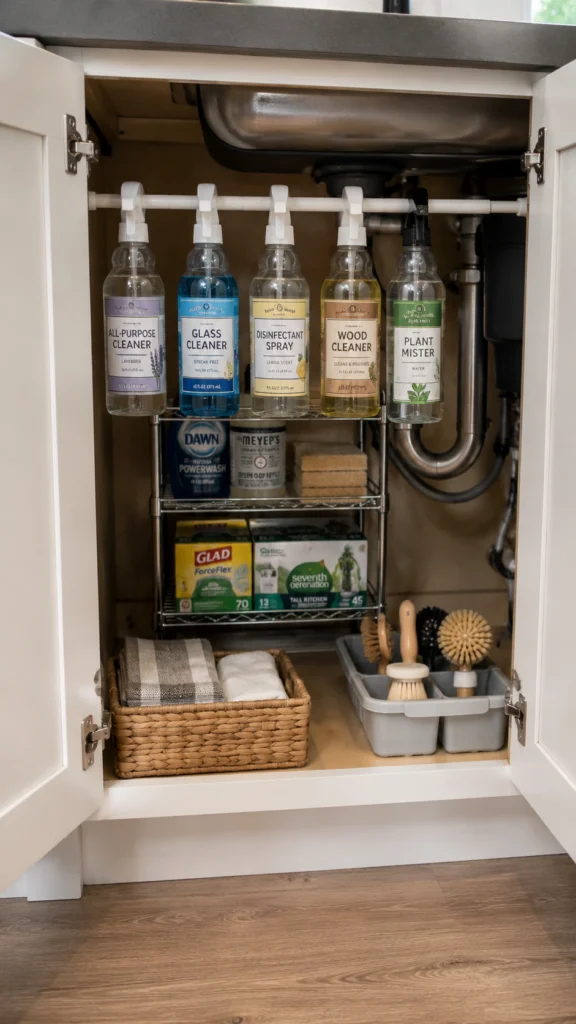
Spray bottles refuse to behave. They tip, they roll, they knock each other over, and within a week, the under-sink cabinet looks ransacked. A tension rod placed across the cabinet fixes this for less than $5: hang every bottle by its trigger handle, and the entire cabinet floor stays open for bins and bulkier supplies.
Installation takes about 30 seconds. Set the rod toward the front of the cabinet so the bottles hang clear of the pipes and you can still reach whatever sits behind them.
5. Install a Two-Tier Under-Sink Organizer
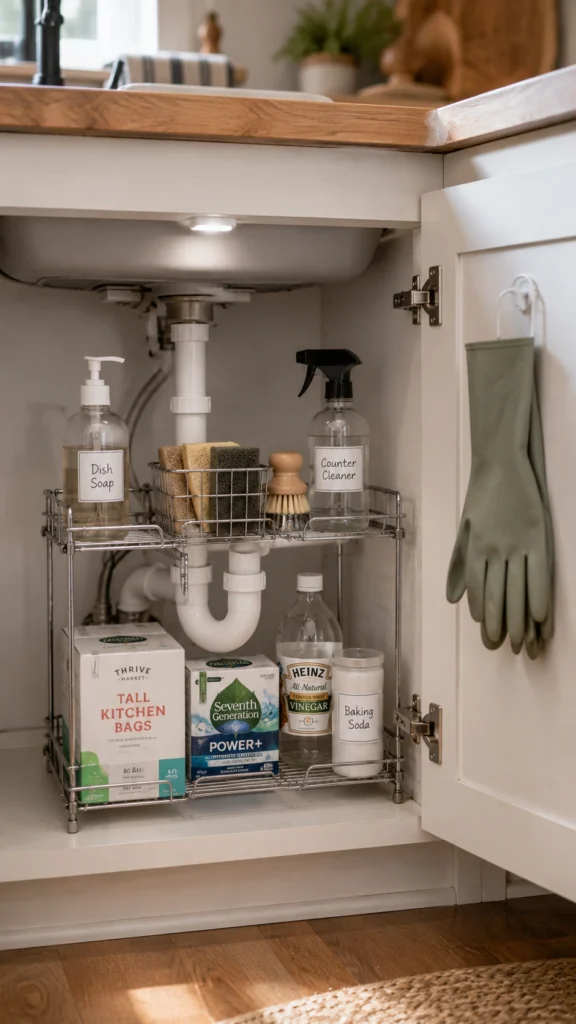
No zone in a small kitchen wastes more space than the cabinet under the sink. The pipes block the middle, so most people shove a couple of bottles in and give up on the rest. A two-tier organizer with an adjustable notch wraps around the plumbing and roughly doubles what fits.
Daily items like dish soap and sponges go on top. Backstock like trash bags and refills goes below. Expect to pay $25 to $45, with no tools involved. One buying note from watching these fail: go metal over plastic if the budget allows. Sinks leak eventually, and metal shelving survives a slow drip that warps the cheap stuff.
6. Double Cabinet Shelves With Risers
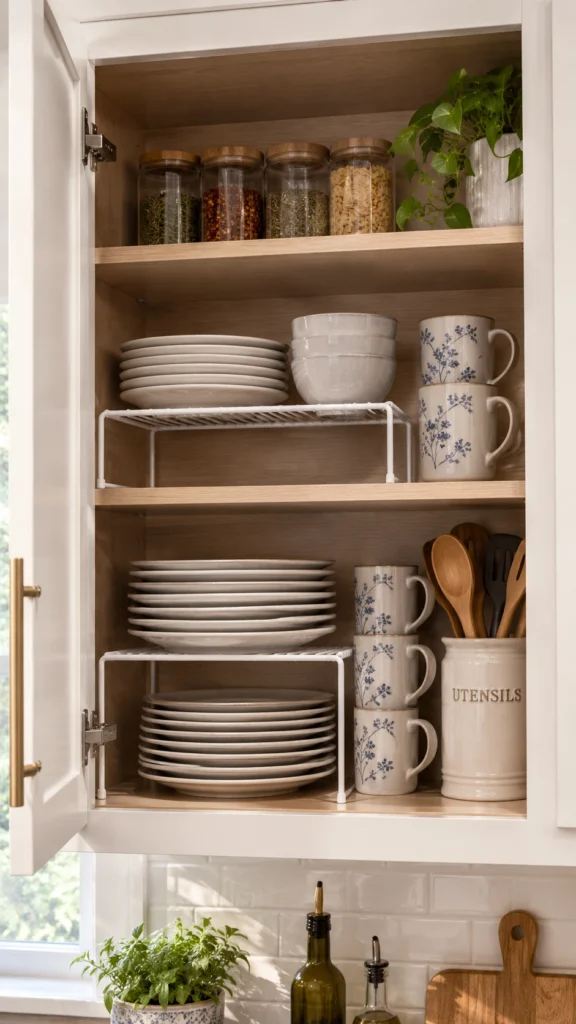
Open any upper cabinet and look at the air between your plates and the shelf above them. That gap is storage nobody’s using. Shelf risers add a second level, so bowls sit on top and plates below instead of one tall stack where the thing you need is always at the bottom.
A set of two runs $10 to $20 and often frees an entire shelf on its own. Older apartment buildings tend to have oddly sized cabinets, which is where stackable and expandable versions earn their keep. Just measure the shelf depth before ordering; a 12-inch riser doesn’t compress to fit a 10-inch cabinet, no matter how optimistic you feel.
7. Put a Lazy Susan in Deep Corner Cabinets
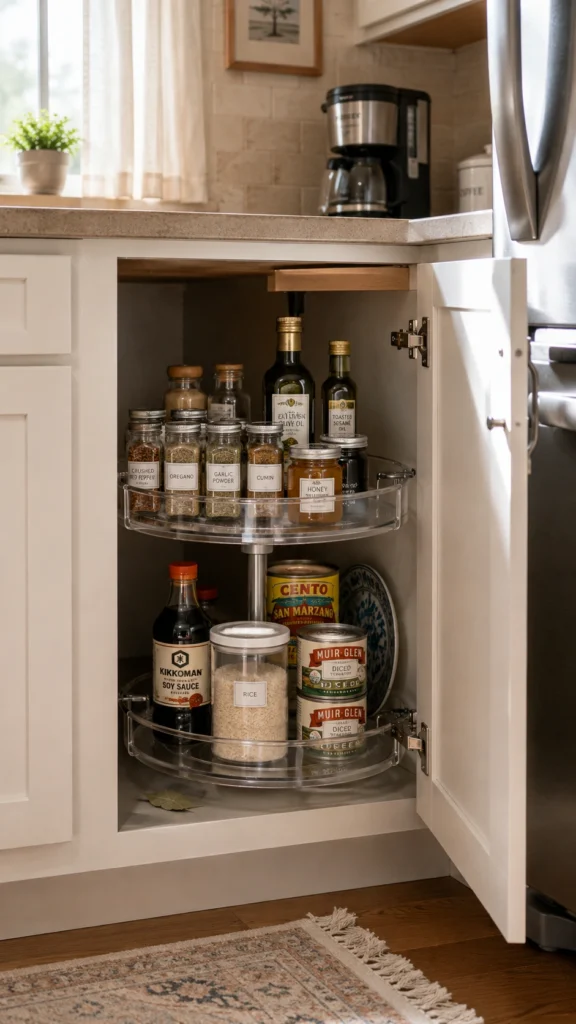
Deep cabinets and blind corners swallow groceries. A bottle of vinegar goes in the back and resurfaces the day you move out. A lazy Susan ends that cycle by spinning the back row to the front whenever you need it.
They start around $10. A single-tier version handles oils and condiments in a lower cabinet; a two-tier version organizes an entire spice collection. Two details matter when buying: a raised lip keeps tall bottles from launching off mid-spin, and the diameter has to pass through your cabinet’s door opening. People check the shelf size and forget the door.
8. Store Baking Sheets and Cutting Boards Vertically
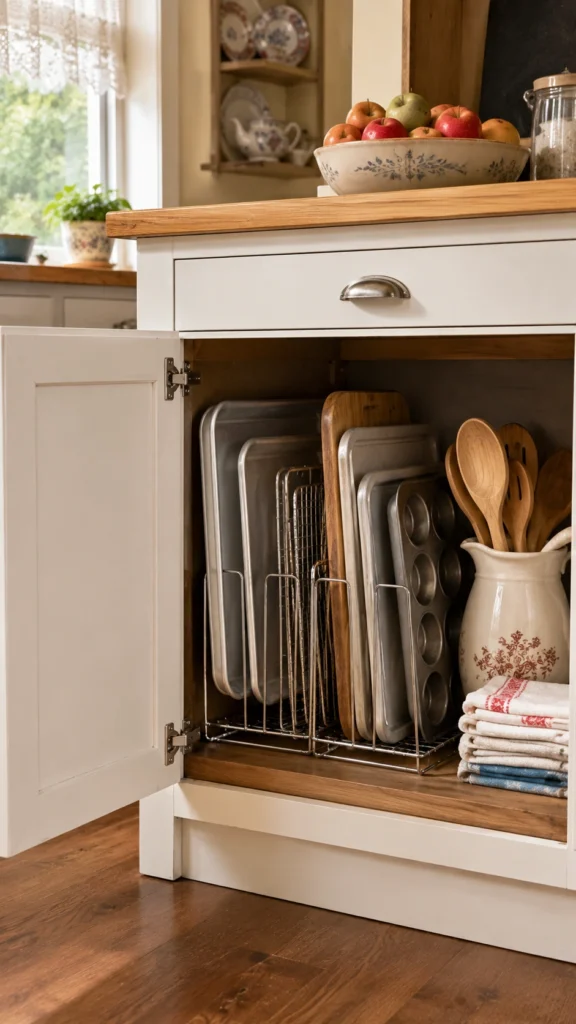
Stacked flat, baking sheets guarantee the one you want is at the bottom of the pile. Stood on edge in a vertical rack or wire file organizer, every sheet, cutting board, muffin tin, and cooling rack pulls out independently, like folders in a filing cabinet.
The logic is simple: vertical storage lets you grab one item without moving the others. A $12 organizer converts a messy shelf into something you’ll never have to dig through again. If your cabinets are already full, the narrow slot beside the oven or fridge works for the same purpose.
9. Mount a Wall Rail With S-Hooks Over the Stove
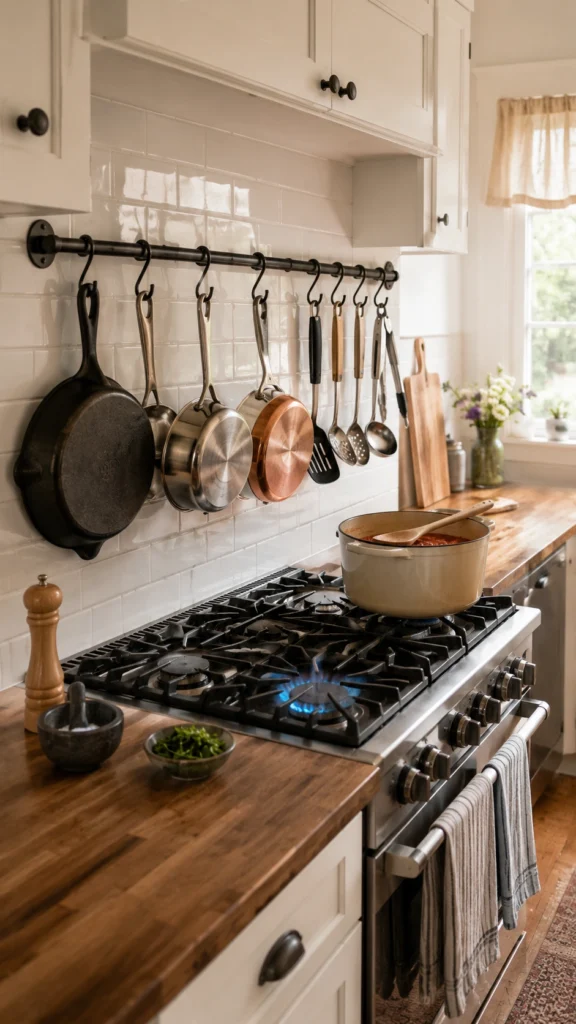
Nothing hogs cabinet space like pots and pans. A wall-mounted rail with S-hooks moves your most-used pieces onto the wall right where you cook, which typically clears two full cabinet shelves and ends the nightly pan avalanche.
A rail and ten hooks cost roughly $20 to $40. Hang the daily skillet, a saucepan, and your cooking utensils; leave the once-a-month pieces in the cabinet. Ceiling pot racks look great in magazine kitchens, but rails suit apartments better in practice. They need no ceiling anchors, they stay within reach for shorter cooks, and your security deposit stays intact. If you’re picking a finish, matte black hides grease marks noticeably better than chrome and looks sharp against white tile.
10. Screw Mug Hooks Under Cabinets or Shelves
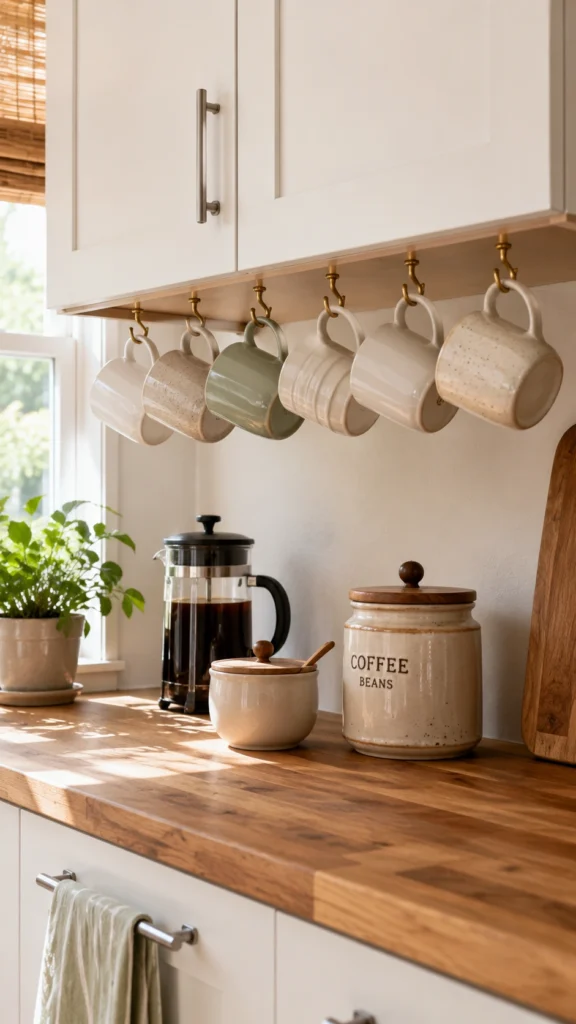
Mugs multiply. Nobody knows how, but every kitchen accumulates more mugs than any household could reasonably drink from. Cup hooks screwed into the underside of a cabinet or shelf hang six to eight of them in the space that previously held air.
A pack of ten brass hooks costs about $6. Renters who’d rather not put holes in cabinetry can use adhesive hooks, though those carry less weight, so reserve them for lighter mugs. Space the hooks roughly 4 inches apart; any closer and the handles clink every time you take one down.
11. Clip Under-Shelf Baskets Onto Cabinet Shelves
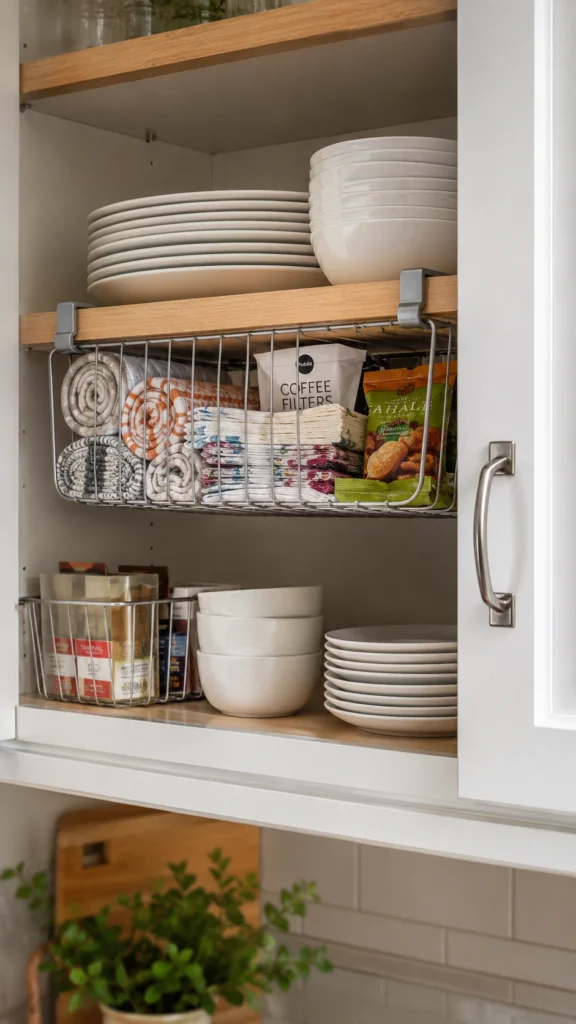
Same dead air as the risers in idea 6, opposite approach. Under-shelf baskets slide onto an existing shelf and hang a wire basket beneath it. No tools, no drilling, nothing permanent.
They suit napkins, dish towels, snack bags, and coffee filters, and at $8 to $15 each, two or three of them cost less than dinner out. People often forget these work beyond cabinets, too: they clip onto open shelving, and a small one inside the fridge keeps deli packets and cheese from disappearing into the shelves.
12. Use the Inside of Cabinet Doors
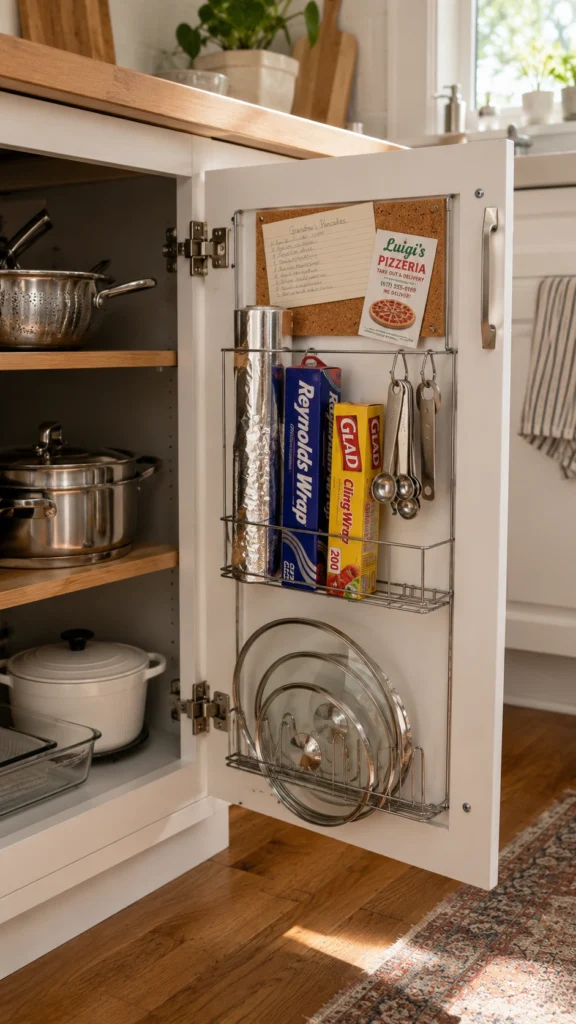
Every cabinet door in your kitchen is flat, vertical, and completely empty on the inside. Adhesive or screw-mounted door racks put that surface to work holding pot lids, cutting boards, foil, plastic wrap boxes, measuring spoons, or cleaning supplies.
The step people skip is checking clearance. The rack has to clear your shelves when the door closes, so measure the gap between the door and the shelf edge before buying. Most standard cabinets give you 2 to 3 inches. Flat items like lids or a corkboard for recipes fit almost anywhere; deeper wire racks need every bit of that clearance, and sometimes a shelf is shuffled back an inch.
13. Hang an Over-the-Door Organizer for Pantry Overflow
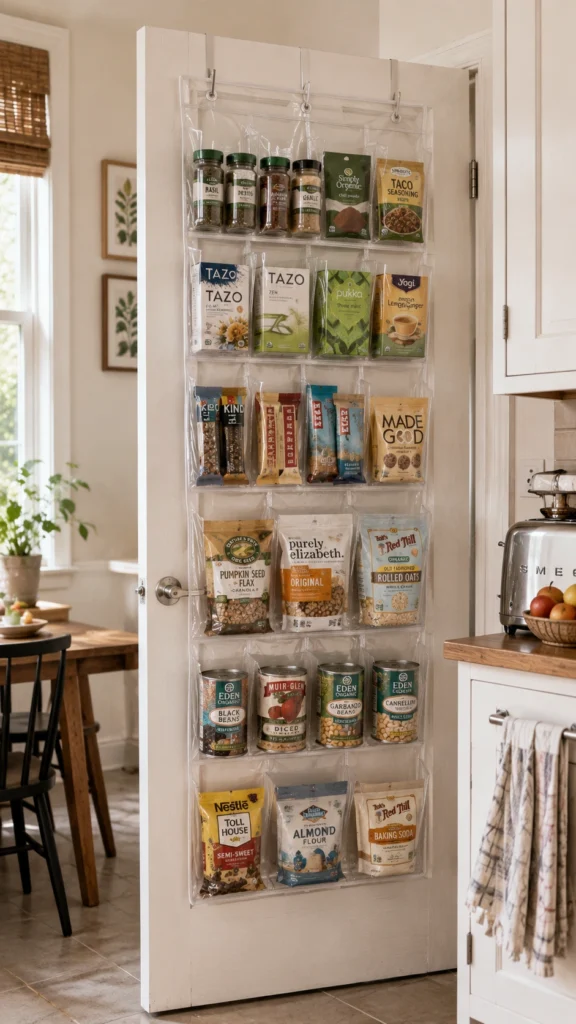
Any door near the kitchen counts here: a closet, a hallway door, or the kitchen door itself. An over-the-door organizer with clear pockets or wire shelves holds snacks, packets, spice jars, tea boxes, and canned goods without claiming a single inch of cabinet space.
These run $10 to $25, and the sturdier models carry 40 pounds or more. Choose the style based on what you’re storing: pockets suit small, light items, while wire shelves handle cans and jars. Assign one category per row, and you can scan the whole thing at a glance instead of hunting.
14. Divide Every Drawer Into Fixed Zones
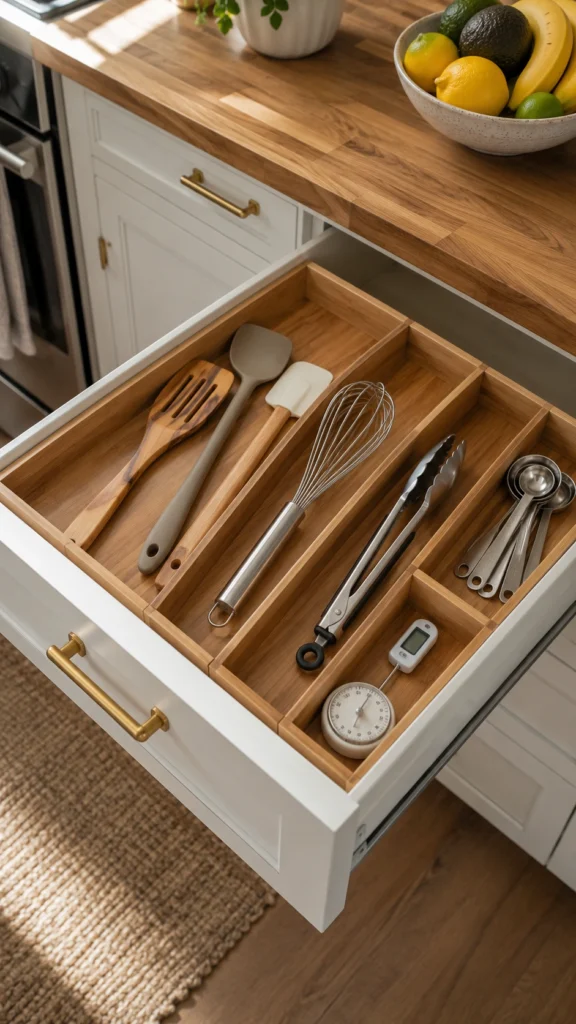
An undivided drawer turns into utensil soup within a week of moving in. Expandable bamboo drawer dividers assign every item a lane: spatulas here, whisks there, measuring spoons in their own slot.
What makes this stick as a habit is that it costs nothing extra day to day. Dropping a spatula into its zone takes exactly as long as tossing it in randomly, but finding it later takes five seconds instead of a minute of rummaging. A four-pack of dividers runs about $20. Measure the drawer’s interior width before ordering, since dividers expand within a range, and the ranges vary between brands.
15. Turn the Side of Your Fridge Into Magnetic Storage
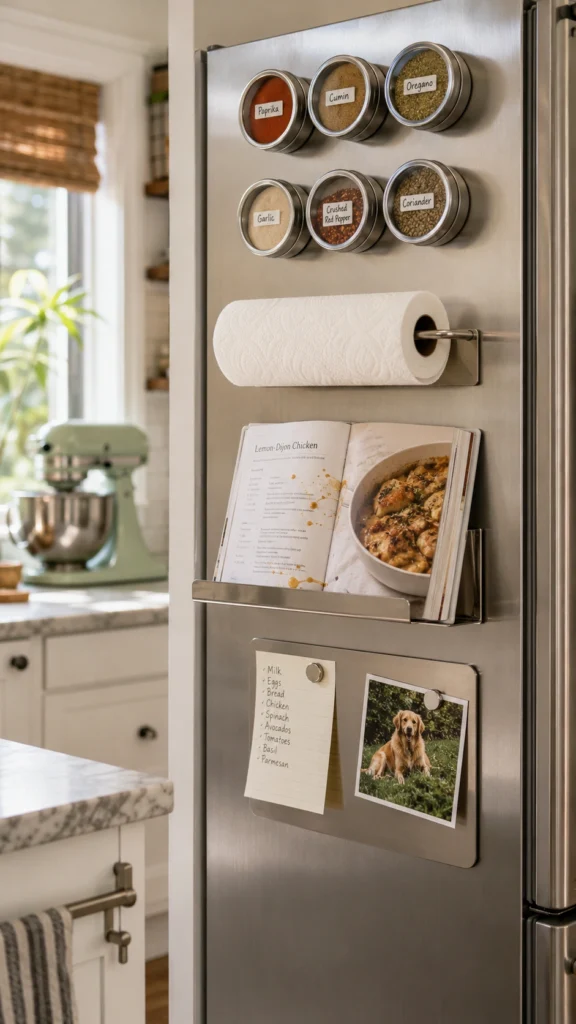
The exposed side of your fridge is a large magnetic panel doing nothing. Magnetic spice jars, a magnetic paper towel holder, or a magnetic shelf convert it into working storage in the time it takes to unbox them.
Spice tins alone justify this. A set of 12 costs $20 to $30, clears a full cabinet shelf, and puts every label where you can see it, which quietly ends the tradition of buying a third jar of paprika because the first two went into hiding. A magnetic shelf on the same surface handles cookbooks, oil bottles, or a small plant if the kitchen is starting to feel like a supply closet.
16. Get a Roll-Up Over-Sink Drying Rack
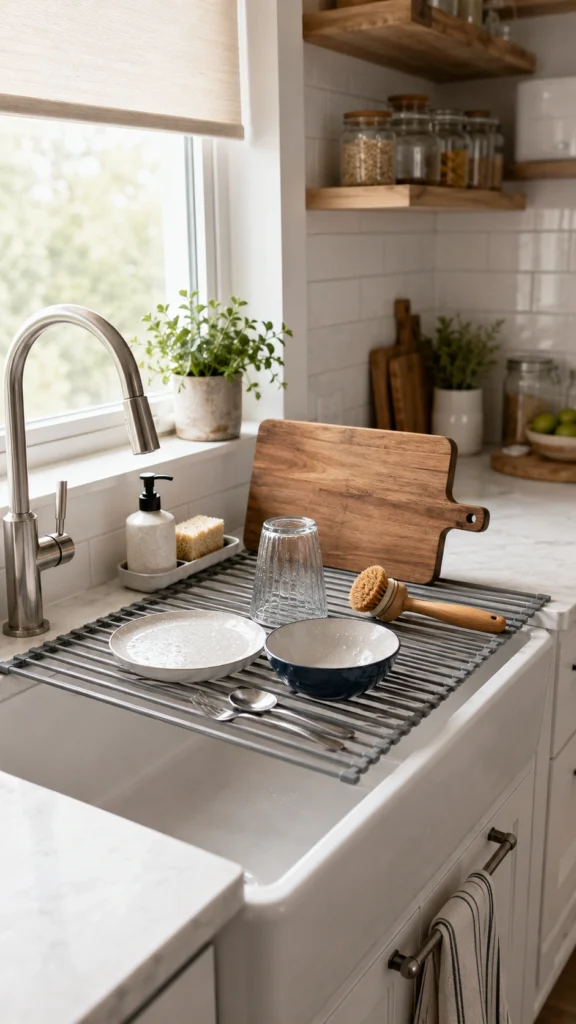
A countertop dish rack claims prime counter space around the clock, whether it’s holding dishes or not. A roll-up rack that sits over the sink gives you a drying zone only when you need one, then rolls into a tube about the size of a rolling pin.
For $15 to $25, it may be the best value on this list, partly because it moonlights as a trivet for hot pots and a rinsing surface for produce. One caveat: the all-plastic versions sag under a cast-iron skillet. Silicone-coated steel handles the weight and lasts years longer.
17. Decant Dry Goods Into Clear Airtight Containers
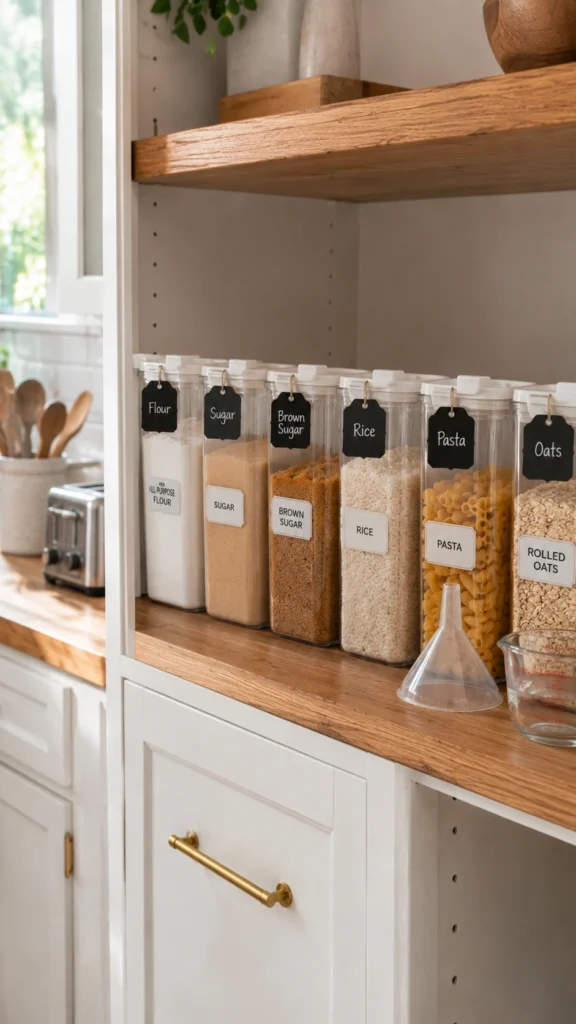
Half-open bags of rice, pasta, and flour are terrible tenants. They slump, spill, take irregular shapes, and hide their contents. Clear airtight containers fix all four problems at once:
- Square containers sit flush against each other, while round bags leave gaps everywhere.
- Visible contents stop you from buying duplicates.
- Stacking uses vertical space that loose bags can’t.
- Sealed lids keep pantry moths out, which matters more than most people realize until it’s too late.
A starter set of six containers costs $25 to $35. Before you toss the original packaging, cut off the cooking instructions and tape them to the back of the container. Pasta timing is exactly the kind of thing you’ll want at 7 p.m. on a Tuesday.
18. Add Baskets Above the Cabinets or on the Fridge
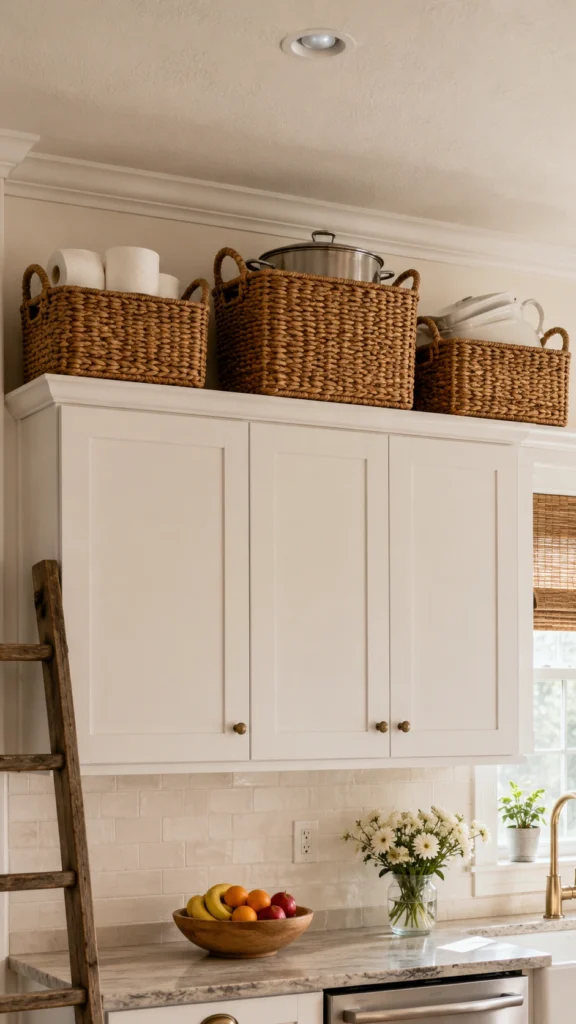
The zone above your upper cabinets and on top of the fridge usually collects dust and maybe one lonely vase. Matching woven or metal baskets turn it into storage for monthly-use items: the stockpot, party supplies, extra paper towels, and the appliances that only work on holidays.
Restraint is what separates styled from cluttered up there. Two or three matching baskets look intentional; a jumble of mismatched boxes looks like a storage unit. Choose baskets with handles, since you’ll be pulling them down from above your head, and label the backs if there’s any chance you’ll forget what went where. There is.
19. Switch to Nesting Cookware and Collapsible Tools
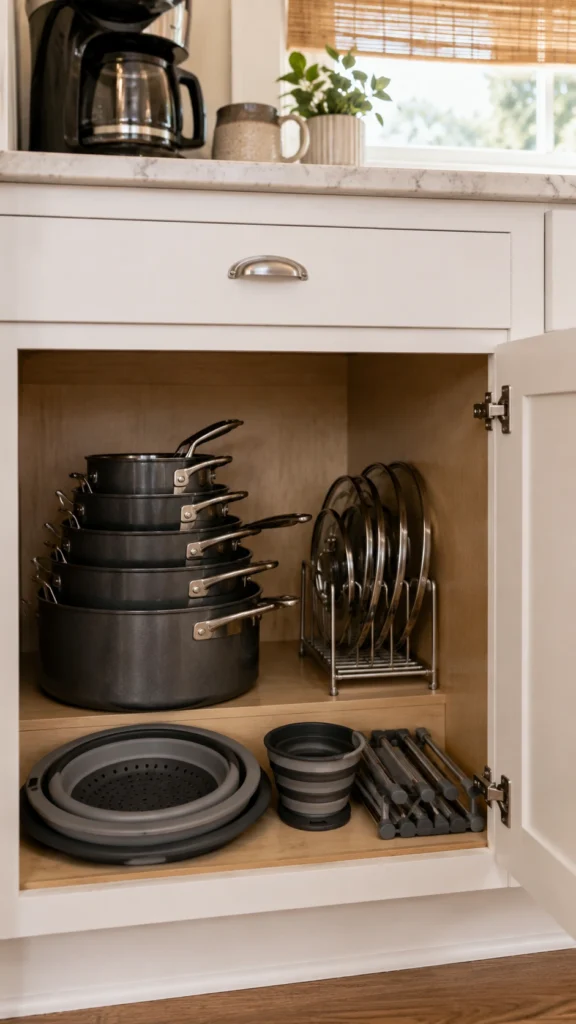
Sometimes the smartest storage idea is owning things that store themselves. Nesting pot sets with removable handles collapse into the footprint of one large pot. Collapsible colanders, measuring cups, and mixing bowls flatten to under an inch.
The space difference is dramatic. A standard 10-piece cookware set needs roughly two full cabinet shelves; a nesting 10-piece set fits in a single stack about 11 inches wide. The catch is price, since nesting sets usually run $120 to $250. If that’s outside the budget right now, a $15 collapsible colander and a folding dish tub deliver a real chunk of the benefit, and you can build toward the full set as pieces wear out.
20. Choose a Storage Bench for Kitchen Seating
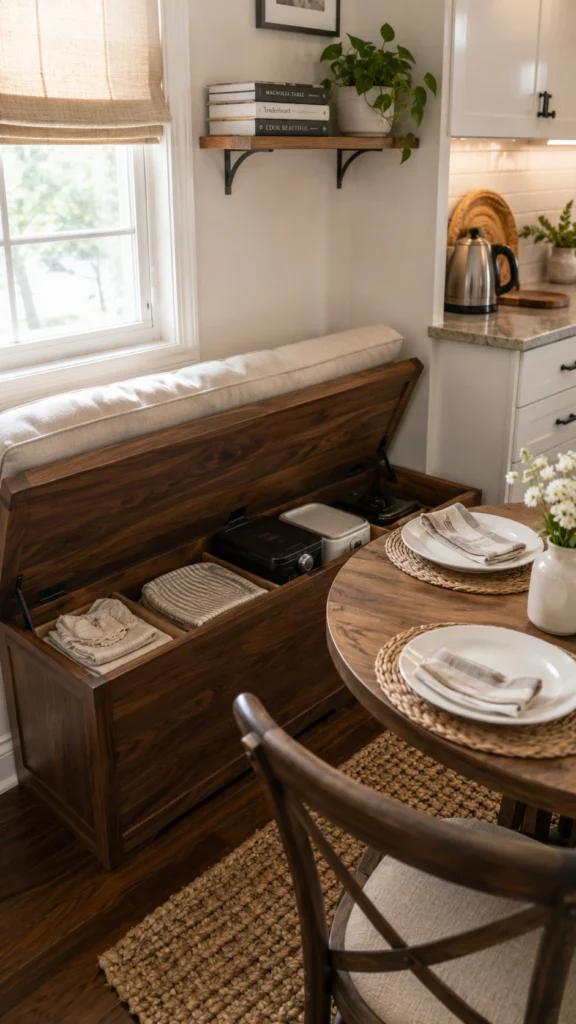
If your eating nook has regular chairs, there’s free storage sitting unclaimed. A storage bench or banquette holds table linens, small appliances, bulk paper goods, or seasonal items inside the seat, in a footprint you were already using.
Between the two styles, a flip-top bench beats drawers in a tight kitchen because it needs zero clearance in front; drawers demand room to slide open, which a small kitchen rarely has. Solid options run $80 to $150, and a cushion turns it into legitimately comfortable seating when people come over. This works best in apartments with a small dining corner, where every chair should be earning its floor space.
21. Install a Fold-Down Wall Table for Prep Space
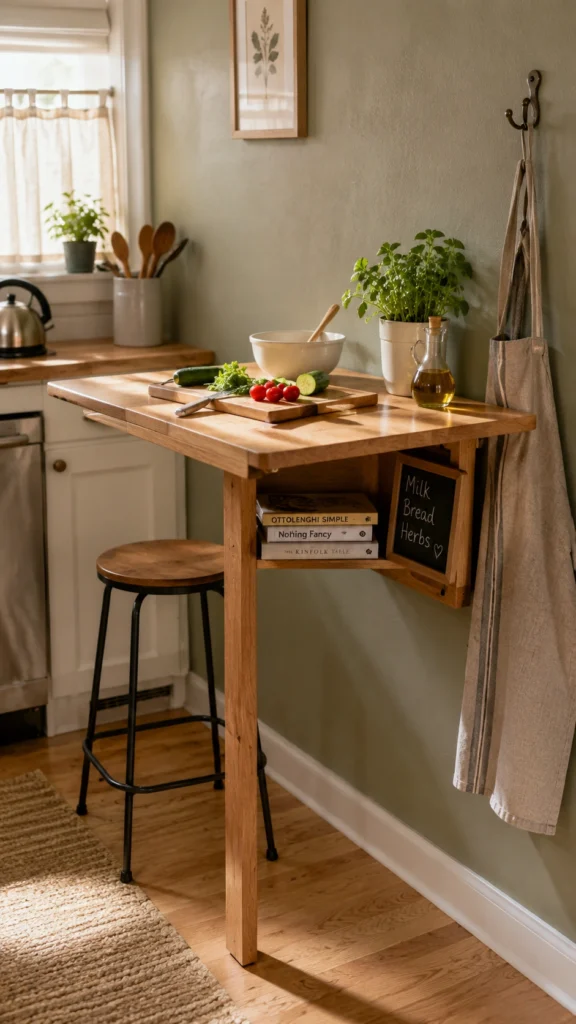
Storage and counter space are really the same shortage, wearing different clothes. A wall-mounted drop-leaf table attacks both: it folds flat against the wall when idle, then drops down into a prep station, breakfast bar, or landing zone when you cook.
Some models hide a shallow shelf or a chalkboard on the underside, so the wall stays useful even with the table folded up. Expect $50 to $120, depending on size and finish. One non-negotiable: anchor it into studs, not just drywall. Sooner or later, you’ll lean your full weight on it while chopping, and drywall anchors were never meant for that moment.
22. Put Your Microwave on a Stand With Storage Underneath
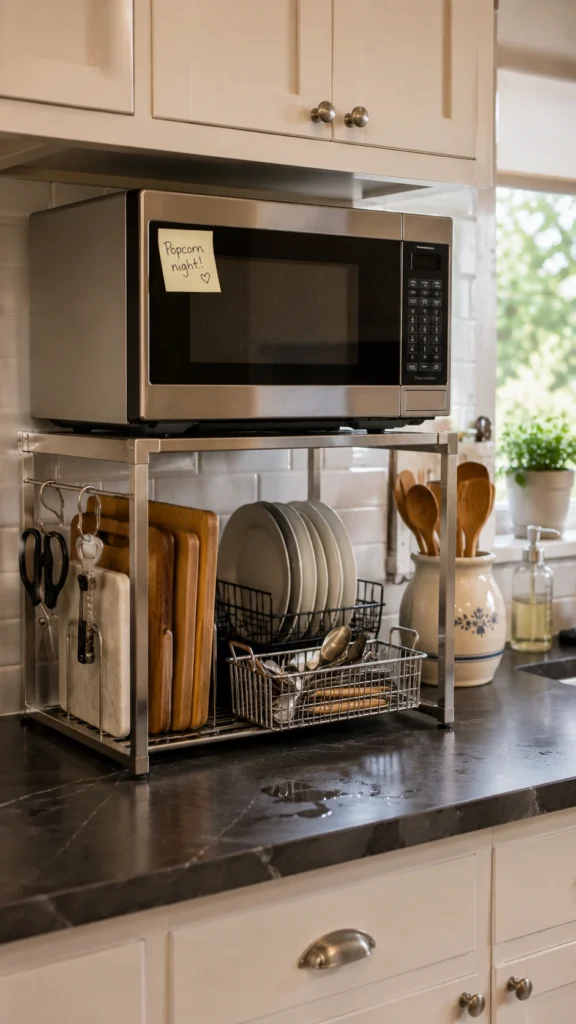
A microwave parked directly on the counter wastes the space beneath it and blocks everything behind it. A microwave shelf or stand lifts it 6 to 10 inches and opens a slot below for cutting boards, a dish rack, or a row of everyday plates.
Expandable stainless versions adjust to your microwave’s width and cost $20 to $35, and many include side hooks for utensils, a small bonus that adds up in a kitchen where every hook counts. Check the weight rating before buying, because larger microwaves push past 30 pounds and the flimsier stands aren’t built for it.
How to Pick the Right Small Apartment Kitchen Storage Ideas First
Twenty-two options is a lot to act on, so it helps to know where the payoff concentrates. Three zones deliver the most space for the least money:
- Under the sink: the tension rod (#4) and two-tier organizer (#5) together cost under $50 and rescue the single most wasted cabinet in the kitchen.
- Walls: the knife strip (#1), rail with S-hooks (#9), and pegboard (#3). Pull your bulkiest items out of the cabinets entirely.
- Inside cabinets: risers (#6), vertical racks (#8), and door racks (#12) often double what your existing cabinets hold.
If the budget question is on your mind, here’s a realistic path. Around $50 covers the tension rod, a knife strip, a set of risers, and a lazy Susan, which touches four separate zones in one weekend. A $150 budget adds the rolling cart, an under-sink organizer, drawer dividers, and a roll-up drying rack. The nesting cookware and storage bench can wait; those are upgrades, not quick wins.
And one honest caveat before you buy anything: no organizer rescues a kitchen packed with things you never use. The bread maker from 2019 and the seven souvenir mugs are taking up space that a $20 organizer can’t give back. A fair rule for tiny kitchens: anything untouched for a year that isn’t seasonal moves out of the kitchen, or out of the apartment. Decluttering is free, and it makes every idea above work noticeably better.
Final Thoughts
A tiny kitchen doesn’t need a renovation. It needs walls that carry weight, cabinets with a second level, and an under-sink zone that stops being a graveyard for spray bottles. Every one of these small apartment kitchen storage ideas survives a rental agreement, and most cost less than a night out.
If deciding where to start feels like its own chore, choose the thing that irritates you most. Pans crashing out of the cabinet every night point to the wall rail. Losing the cumin twice a week points to magnetic tins. Fix that one pain point and notice how differently the kitchen feels; the second project tends to follow on its own.
The space was there all along. Go claim it.
Frequently Asked Questions
How do you add storage to a small kitchen without drilling?
Tension rods, adhesive-mounted knife strips, and door racks, over-the-door organizers, under-shelf baskets, and a slim rolling cart all install without a single hole. Between those options, you can cover the under-sink cabinet, cabinet doors, and the fridge gap while keeping your security deposit untouched.
What’s the best storage idea if I can only buy one thing?
The slim rolling cart is especially useful if your apartment has no pantry. It creates three or four shelves of food storage in a gap that currently holds nothing, costs $25 to $60, and moves out with you. If you already have pantry space, the two-tier under-sink organizer is the stronger pick.
How do I store pots and pans in a small apartment kitchen?
Hang the pieces you use daily on a wall rail with S-hooks near the stove, which usually clears two cabinet shelves. Stand the lids and baking sheets vertically in a wire rack. If cabinet space is still tight after that, nesting cookware with removable handles condenses a full set into one stack about 11 inches wide.
What should I do first: buy organizers or declutter?
Declutter, every time. Organizers make useful things easier to reach; they can’t compensate for a kitchen full of items you never touch. Clear out anything unused for a year that isn’t seasonal, then buy for the space that’s left. Most people need fewer organizers than they expected once the extras are gone.
Are these small apartment kitchen storage ideas renter-friendly?
Yes, all 22 work in rentals. Most need no installation at all, and the ones that do (knife strip, wall rail, pegboard, fold-down table) use small screw holes that patch in minutes, or adhesive versions if you’d rather avoid holes entirely. The fold-down table is the only one that needs stud mounting, so skip it if your lease is strict about wall anchors.