
The kitchen does more work in October than any other room in the house. It’s where the cookies get baked, the punch gets mixed, and the candy bowl gets refilled for the fourth time. And yet most people pour all their decorating energy into the porch and the mantel, then walk back into a kitchen that still looks like September.
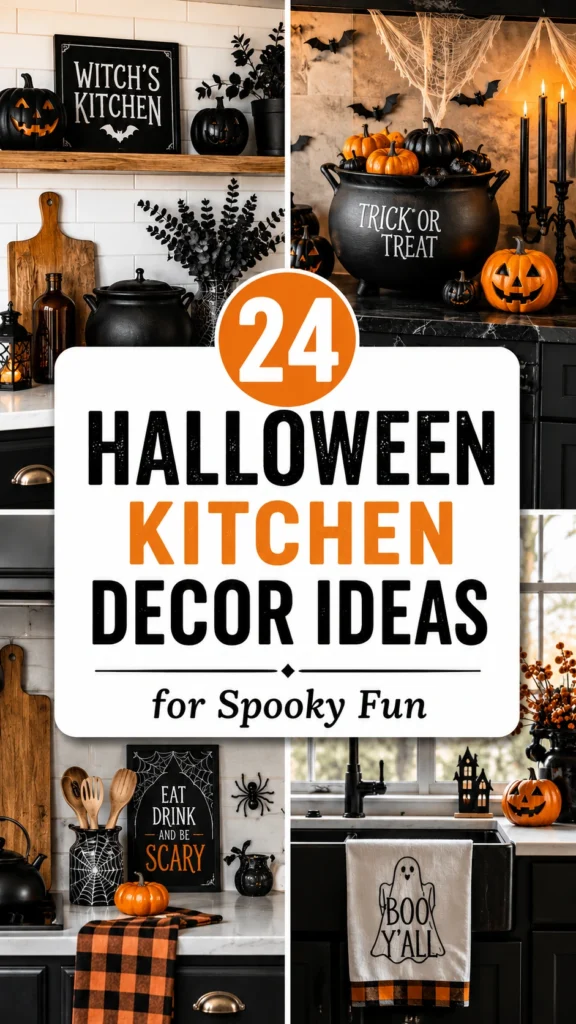
That’s an easy fix. Below are 24 Halloween kitchen decor ideas, ranging from five-minute swaps to full haunted makeovers. Most cost less than a weekly latte habit, and every one of them works in a kitchen where people actually cook. No idea here requires you to give up counter space you use daily.
How to Pick Halloween Kitchen Decor That Actually Works
Match the Decor to How You Cook
Look at your counters honestly before you buy anything. If you cook every night, choose decor that hangs, leans, or replaces something you already use. If your kitchen mostly functions as a coffee station, you have room for bigger statement pieces.
Set a Halloween Kitchen Decor Budget First
Decide on a number before you walk into HomeGoods. That store has emptied wallets belonging to far more disciplined people than you or me. Somewhere between $30 and $75 covers five or six of the ideas below comfortably, and anything you make yourself stretches the budget further.
1. Ghost Tea Lights That Glow on Your Windowsill
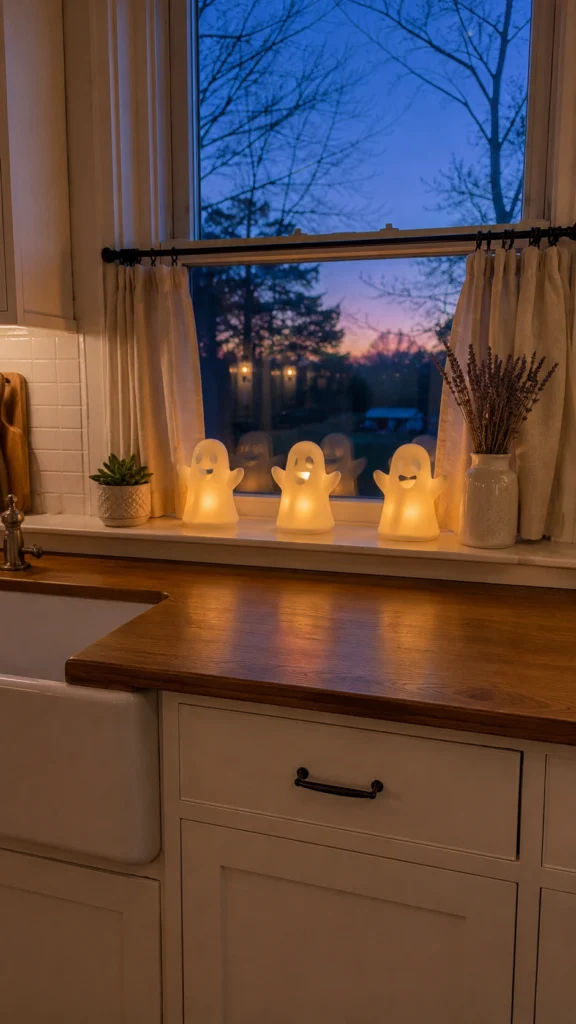
Ghost tea light holders earn their spot through sheer laziness-to-payoff ratio. Set three or four along a windowsill or open shelf, drop in flameless tea lights, and they glow softly all evening with zero maintenance. The light through white ceramic or frosted glass looks genuinely eerie after dark.
Go flameless here. Kitchens get chaotic, and an open flame next to the paper towels while you’re wrestling a Dutch oven is asking for trouble. If you buy tea lights with built-in timers, the ghosts light themselves at dusk and you won’t think about them again until November.
2. Show Off Retro Halloween Plates on Open Shelves
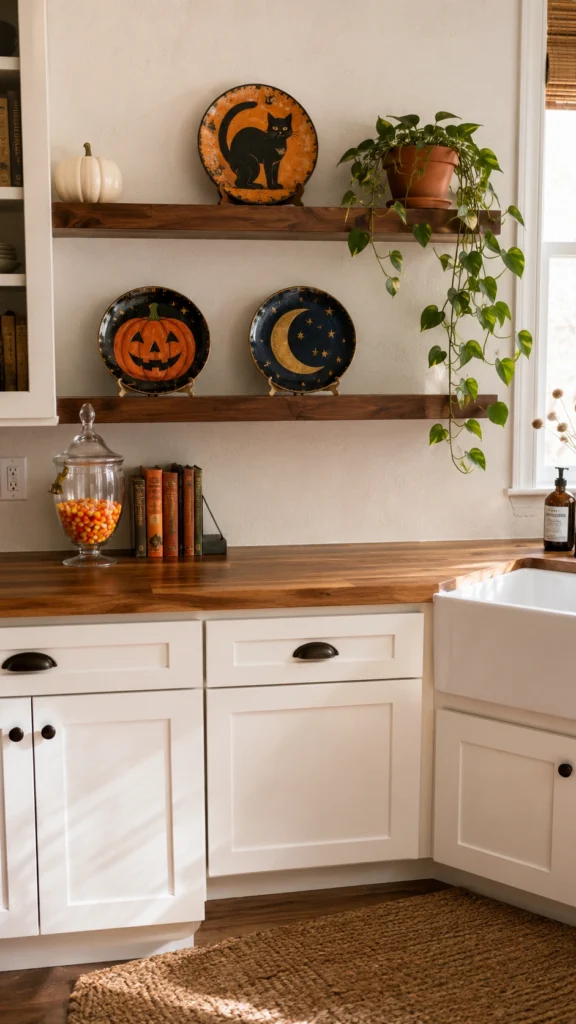
Vintage-style Halloween plates deserve better than a life inside a closed cabinet. Prop them on plate stands along an open shelf or behind glass cabinet doors, and the display reads collected rather than bought in one trip. Black cats, crescent moons, and 1950s-style grinning pumpkins are the designs worth hunting for.
Thrift stores and estate sales turn up real vintage pieces for a few dollars each. The reproduction lines at Target and HomeGoods look nearly as good if you’d rather skip the hunt. Either way, this one suits kitchens with open shelving or a hutch, where the plates stay visible all month instead of appearing only at dinner.
3. Roll Out an Orange-and-Black Runner
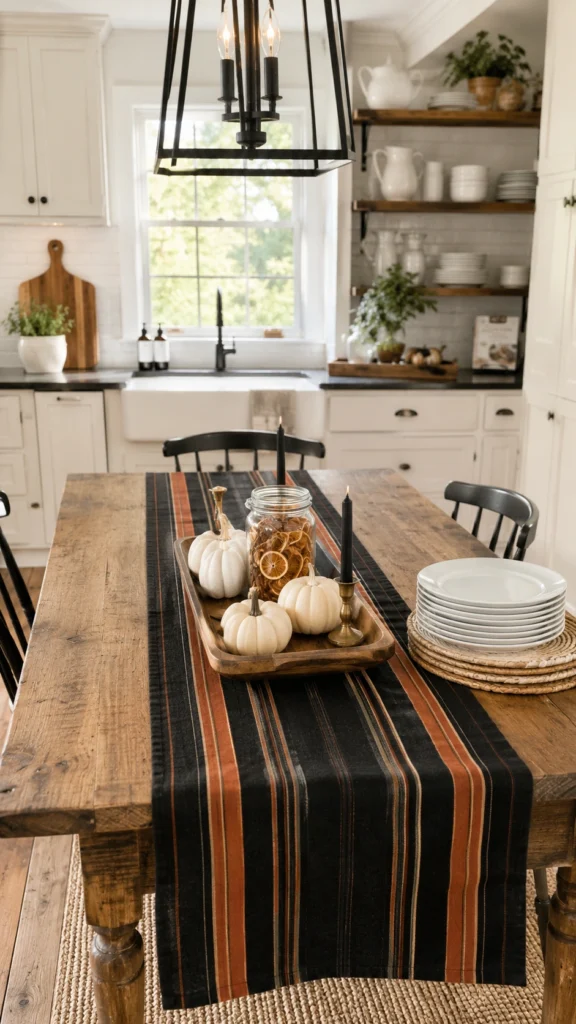
Ten seconds. That’s roughly how long it takes to unroll a black and orange table runner, and it changes the mood of the whole table. Suddenly the surface looks intentional instead of buried under mail and homework.
A subtle pattern, thin stripes or a small damask, will carry you into November without clashing with Thanksgiving prep. Loud jack-o’-lantern prints work too, though they commit you to October and nothing else. If $15 for a runner feels steep, a yard of black-and-orange fabric hemmed with iron-on tape runs about $8 and looks the same from three feet away.
4. Serve Snacks on a Pumpkin Platter
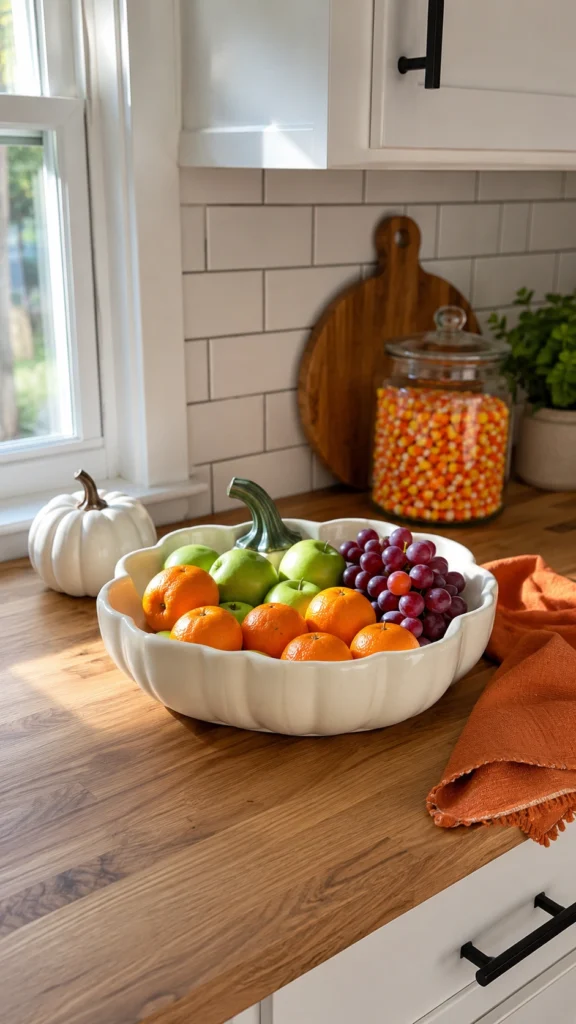
A pumpkin-shaped platter decorates the counter even when it’s empty, which is what makes it worth the cabinet space. Fill it with deviled eggs at a party, or leave it on the island holding clementines the rest of the month. Matte white and classic orange ceramic both photograph well.
Kids, for reasons no one has fully explained, treat food on a themed plate as an event. Serve an ordinary Tuesday quesadilla on a pumpkin platter and watch it become a party. One buying note: go at least 12 inches across. Undersized platters end up as decoration only, and decoration-only pieces are the first thing you resent storing in November.
5. Swap In Halloween Dish Towels
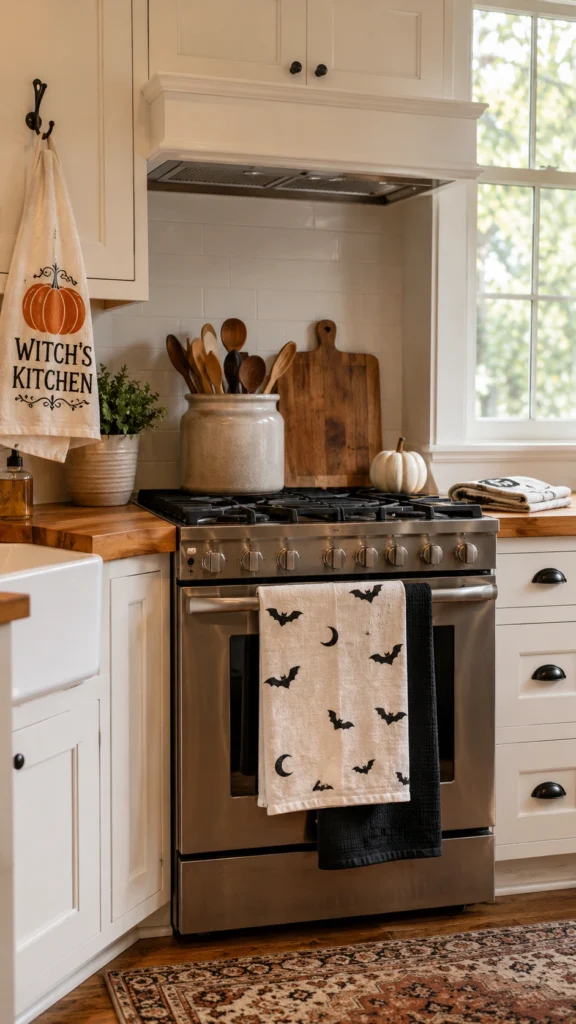
Dish towels are the cheapest entry point into Halloween kitchen decor, full stop. Drape two over the oven handle, hang one from a hook, and you’ve hit three focal points for under $15. Witty phrases, bats, and simple black-and-white patterns all work.
Choose flour sack cotton over decorative polyester if you actually plan to dry dishes. A pretty towel that can’t absorb water just creates laundry. For a slightly more finished look, layer a patterned Halloween towel over a solid black one on the oven handle. The doubled fabric reads styled rather than tossed.
6. Style a Web-Wrapped Centerpiece
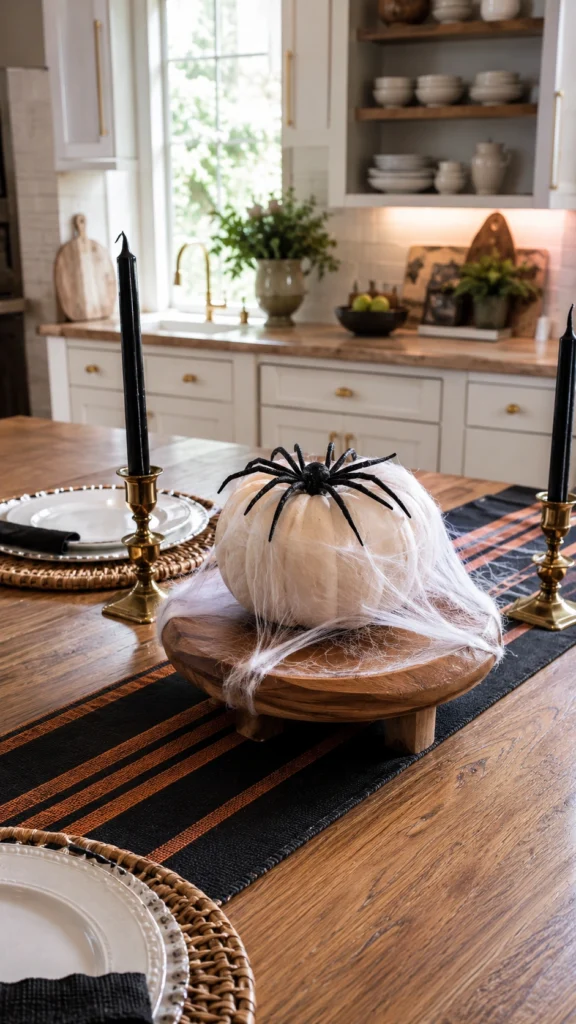
The trick with fake spider webbing is restraint, and almost nobody uses it. Stretch it thin and wispy across a low bowl or cake stand, tuck in a small pumpkin, and add one oversized spider rather than ten small ones. A single dramatic element beats scattered clutter every time.
Keep the whole arrangement under 12 inches tall so people can still see each other at dinner. Thick clumps of webbing are the most common failure here. Pulled tight into wads, the stuff looks like cotton balls, and a cotton ball scares no one.
7. Perch Witch Hats on Your Shelving
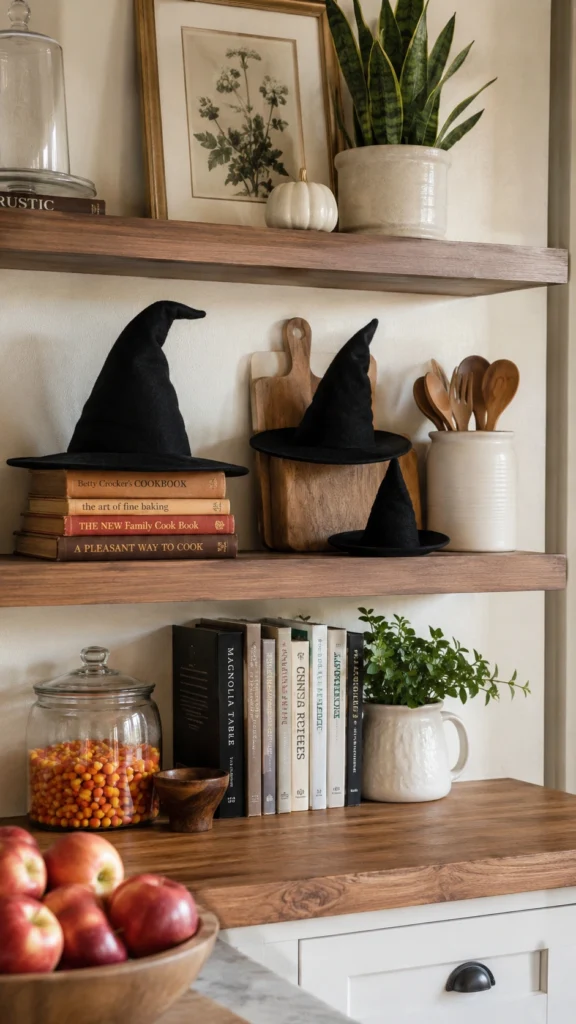
A pointed hat silhouette reads as Halloween from across the room, which makes witch hats useful on open shelving where small details get lost. Set a mini felt hat on a stack of cookbooks, perch one on a canister, or lean a full-size hat into the backsplash corner.
If you use more than one, vary the sizes. Three identical hats in a row look like store inventory. A large, medium, and small grouping looks like someone chose them. This idea does its best work on floating shelves or a coffee bar that needs a seasonal refresh anyway.
8. Layer Candy Corn in a Mason Jar
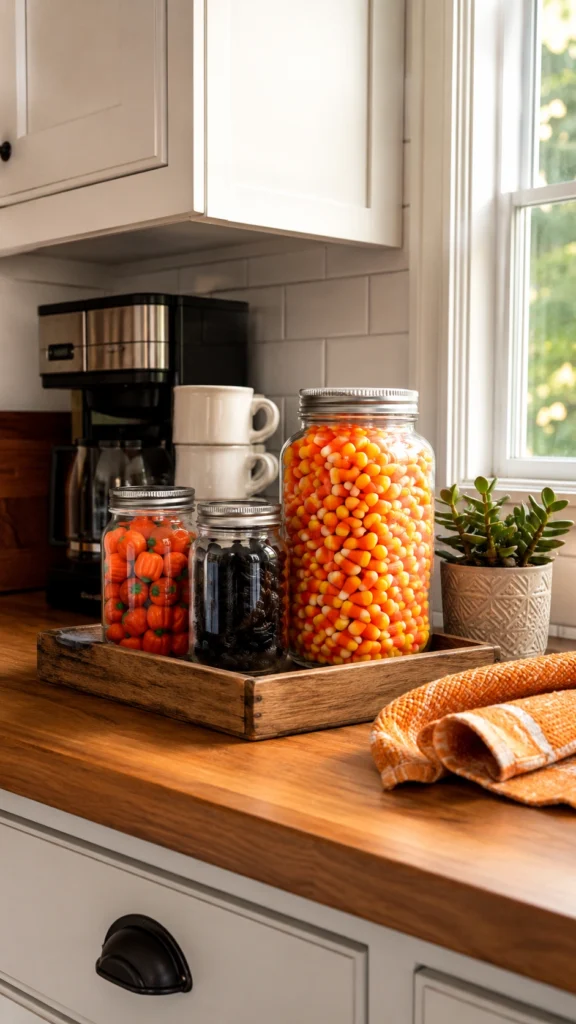
The candy corn jar survives every trend cycle because it does exactly what it promises. Fill a quart mason jar, screw on the lid, set it beside the coffee maker. The orange, yellow, and white layers match every other Halloween decoration you own.
For a fancier version, line up three jars in graduated sizes filled with candy corn, candy pumpkins, and black licorice, all on one wood tray so they read as a single arrangement. And keep the lid on. Candy corn goes stale fast, and stale candy corn manages to make an already divisive candy worse.
9. Stage a Skeleton Escaping the Cabinets
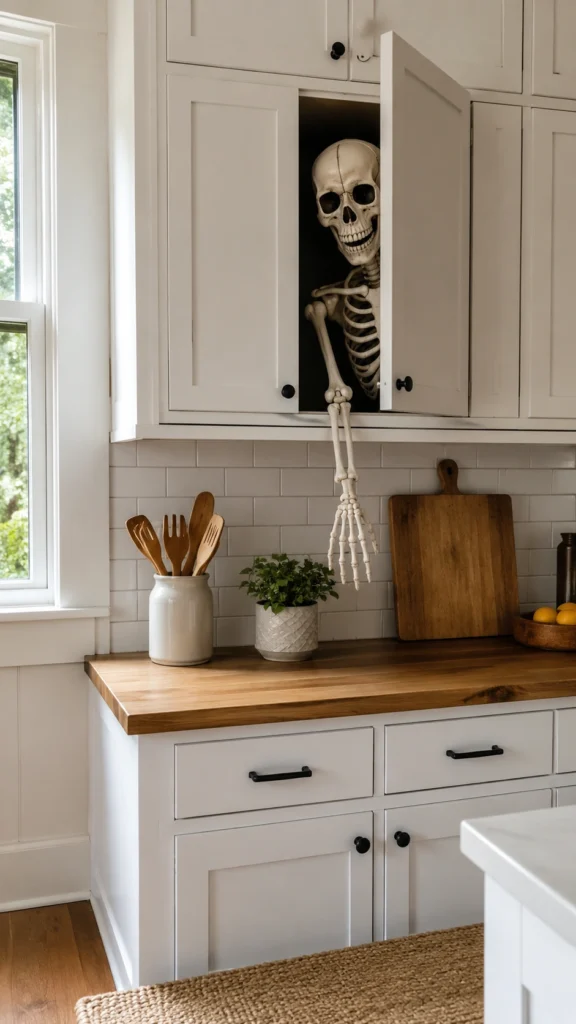
A $10 plastic skeleton positioned with its hand and skull poking out of a partially open upper cabinet gets more reactions than $100 of tasteful garland. I’ve seen guests do a genuine double take at this one. Placement decides whether it lands.
Aim for eye level or above. A skeleton peeking from a low cabinet reads as clutter, while one reaching down from above the fridge looks like it’s mid-escape. Secure it with removable adhesive strips so the cabinet still opens, because you will need that cabinet before November 1.
10. Stick Bat Cutouts Across the Window
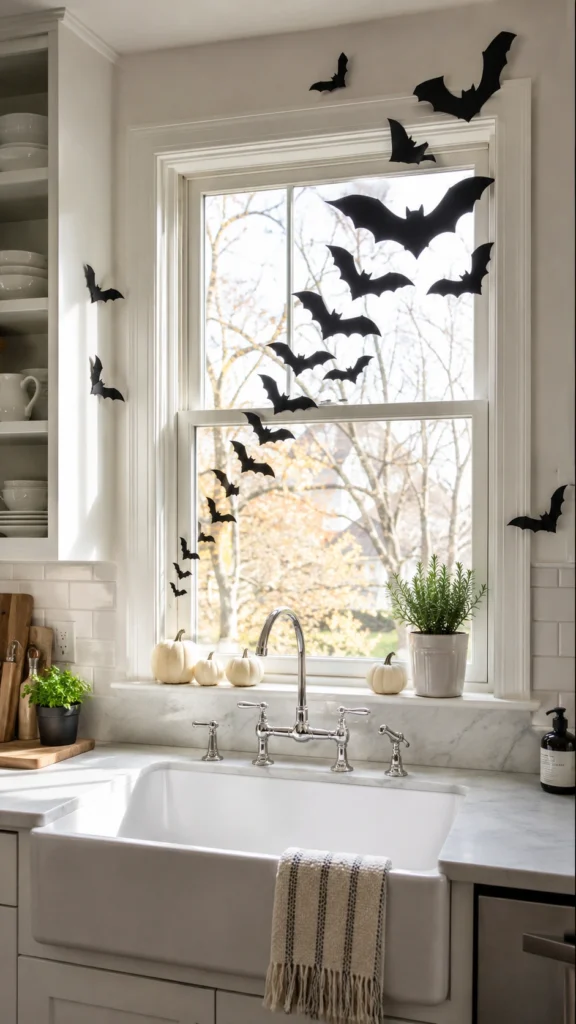
Black paper bats on the kitchen window work from both sides of the glass, which makes them unusually efficient decor. Cut them from cardstock or buy 3D adhesive wall bats. Cluster them in the window’s upper corner, then let a few stray onto the surrounding wall.
The cluster-and-scatter arrangement matters more than the bats themselves. A neat grid looks like wallpaper. A diagonal swoop across the glass looks alive. If you’d rather spend nothing, print a free bat template, trace it onto black construction paper, and attach with washi tape.
11. Trade Your Cookie Jar for a Haunted House
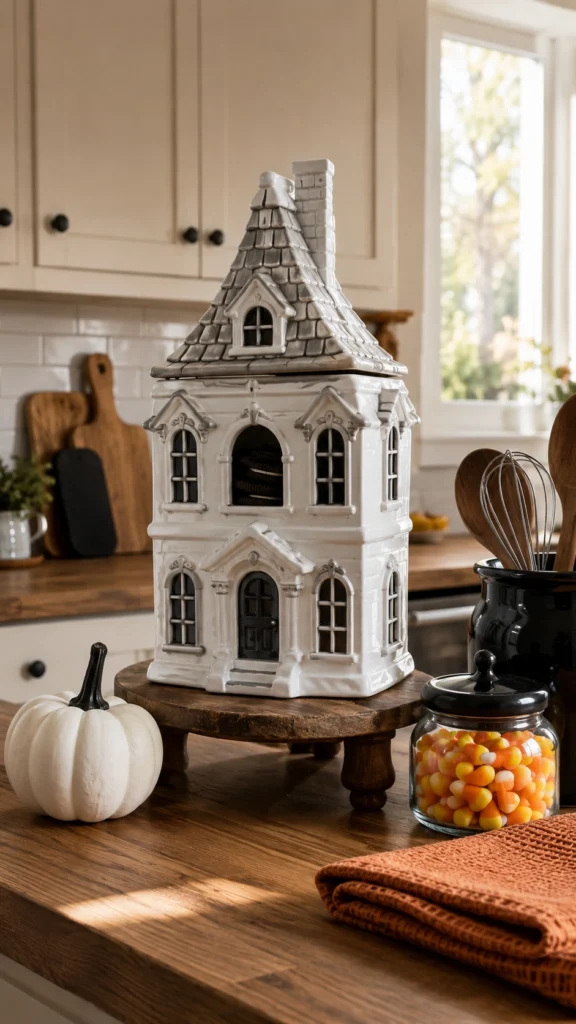
Counter space is the scarcest resource in most kitchens, so decor that stores food beats decor that just sits there. A haunted house cookie jar is the best example on this list. Ceramic versions with lit windows or lift-off roofs show up every fall at HomeGoods, Michaels, and Target, usually between $25 and $40.
Fill it with Halloween Oreos and it will empty itself. Set it on a small riser or an upside-down cake stand so it sits slightly taller than everything around it, since a little height is what turns an object into a focal point.
12. Add Glow-in-the-Dark Decals to the Backsplash
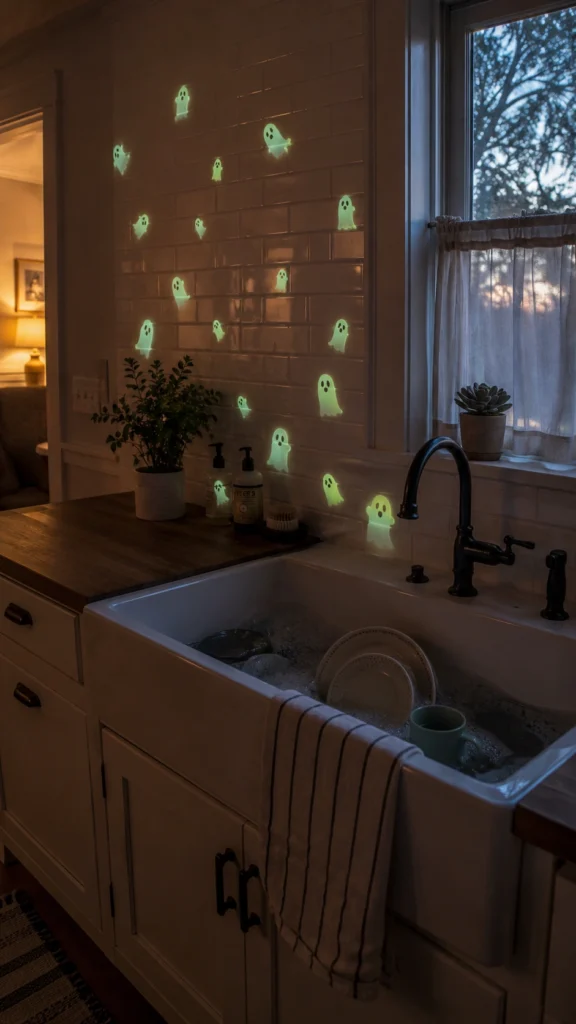
Midnight snack runs are when glow decals earn their keep. Ghost, bat, or spider decals on the backsplash charge under your normal kitchen lighting all day, then glow the moment you flip the switch off.
Removable vinyl versions peel off cleanly, which matters if you rent. Test one in a hidden spot first if your walls have flat paint, because flat finishes sometimes hold adhesive harder than satin or semi-gloss. Fair warning for parents: kids will demand a lights-off demonstration every night through October, and possibly beyond.
13. Display a Spooky Cutting Board
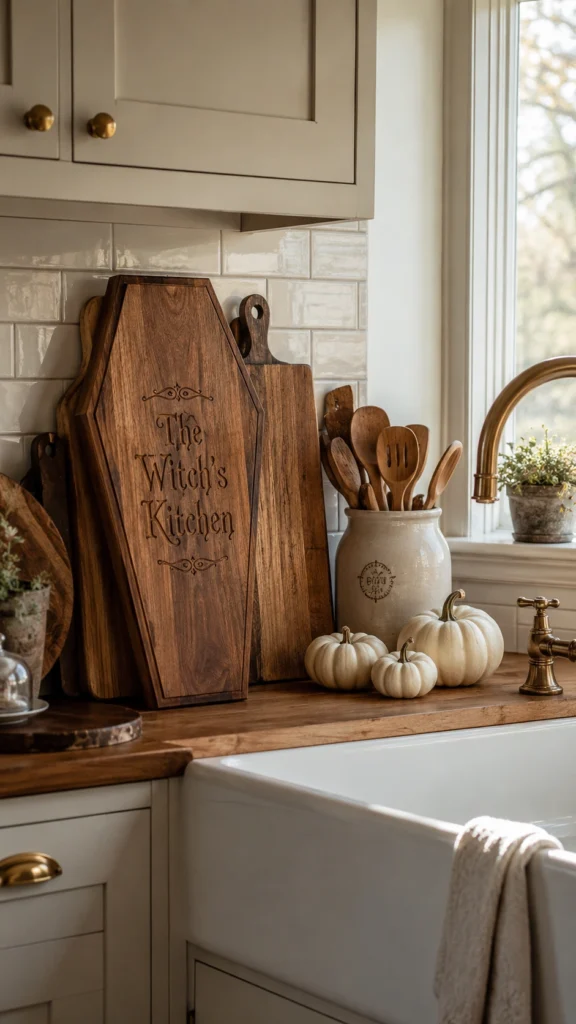
A cutting board engraved with “The Witch’s Kitchen,” or shaped like a coffin, decorates the prep zone without claiming any new territory. Lean it upright against the backsplash behind your everyday boards.
Keep engraved boards for display and serving rather than heavy chopping, since deep knife work chews up the design. Save the onion dicing for your beat-up workhorse. Where these boards genuinely shine is charcuterie. A cheese spread on a coffin-shaped board gets photographed at every October gathering, without exception in my experience.
14. Chalk Up a Witch’s Menu Board
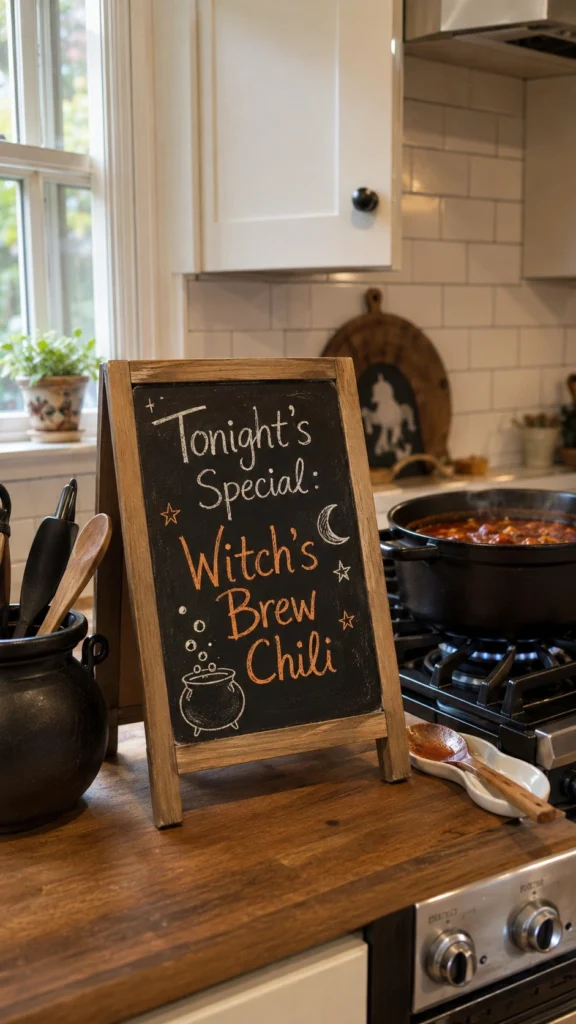
A small chalkboard is the only item on this list that gives you new content every week for free. Write “Tonight’s Special: Witch’s Brew Chili” or “Poison Apples, $1” and prop it near the stove. Change it weekly so the joke stays fresh.
Shaky handwriting is fine, and honestly preferable. Imperfect chalk lettering looks more charming than anything printed. If you can’t find a chalkboard you like, paint one side of a thrifted picture frame’s glass with chalkboard paint for about $6 total.
15. String Garland Along Your Shelves
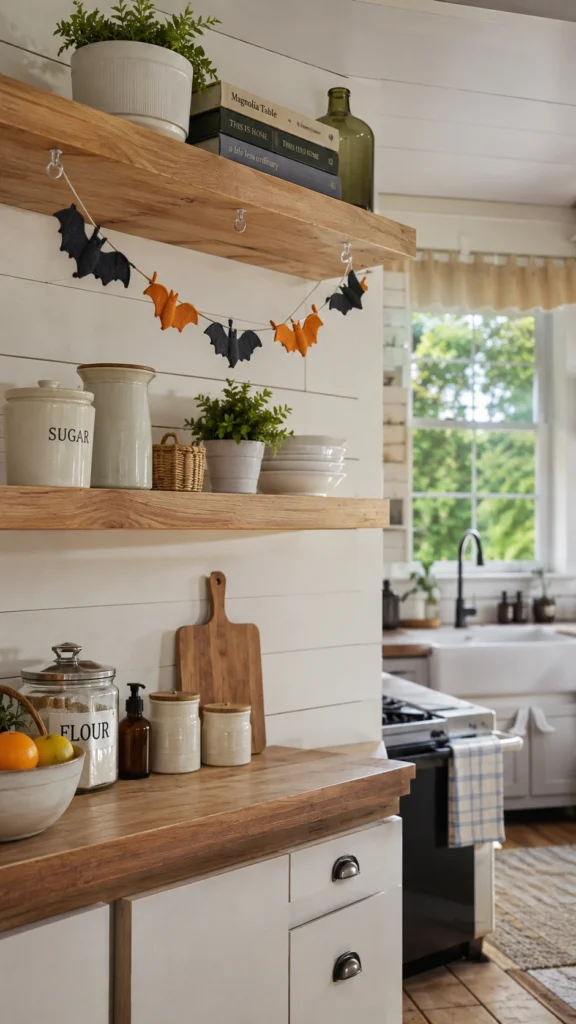
Garland frames the kitchen without touching a single counter, which is why it belongs in small spaces especially. Felt bat garlands, paper ghost banners, and orange-and-black tassels all hang with removable hooks or washi tape along shelf edges or above the window.
Drape it in a gentle swag rather than pulling it tight. Taut garland reads like caution tape. One anchor point roughly every 18 inches keeps the curves even. And check what’s below it before you commit: paper banners hung directly above the stove wilt fast once the pasta water starts steaming.
16. Turn a Cauldron Into Your Utensil Holder
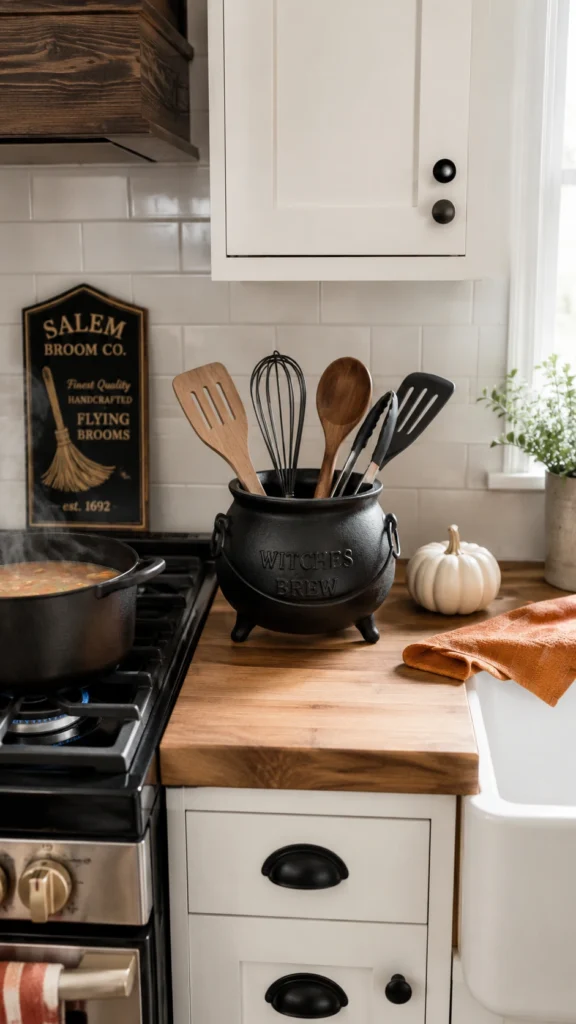
If I had to pick only one idea from this list for a small kitchen, this is it. Swap your regular utensil crock for a black cauldron, 6 to 8 inches wide, and your spatulas instantly look like potion equipment. The counter carries the same number of objects as before, but one of them now says Halloween.
Swap-based decorating is the principle worth stealing here, even beyond this one item. For the full effect, keep only wooden and black utensils in the cauldron for the month. A rainbow silicone spatula sticking out of a witch’s cauldron undoes the whole thing.
17. Drape the Table in Black Lace
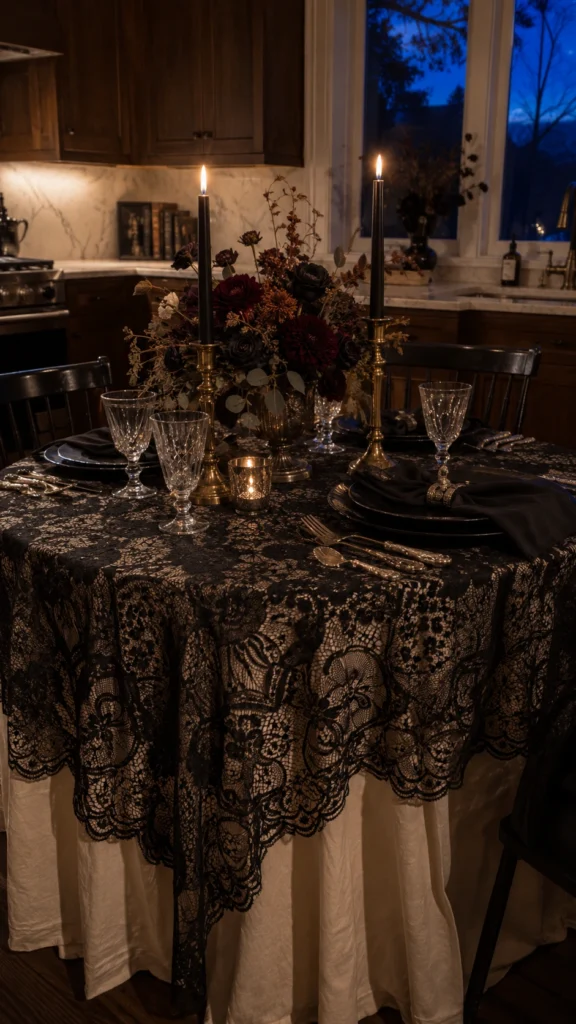
Not every Halloween kitchen needs to be cute. A black lace tablecloth layered over a solid orange, cream, or white base cloth casts patterned shadows across the table and reads more Victorian séance than kids’ party.
This direction suits adult gatherings and moodier interiors. Pair it with brass candlesticks and dark florals, and leave the plastic spiders in the bin. One money-saving move: buy lace fabric by the yard at a craft store instead of a finished tablecloth. You’ll pay about half the price and can cut it to your exact table size.
18. Tuck Mini Pumpkins Into Empty Corners
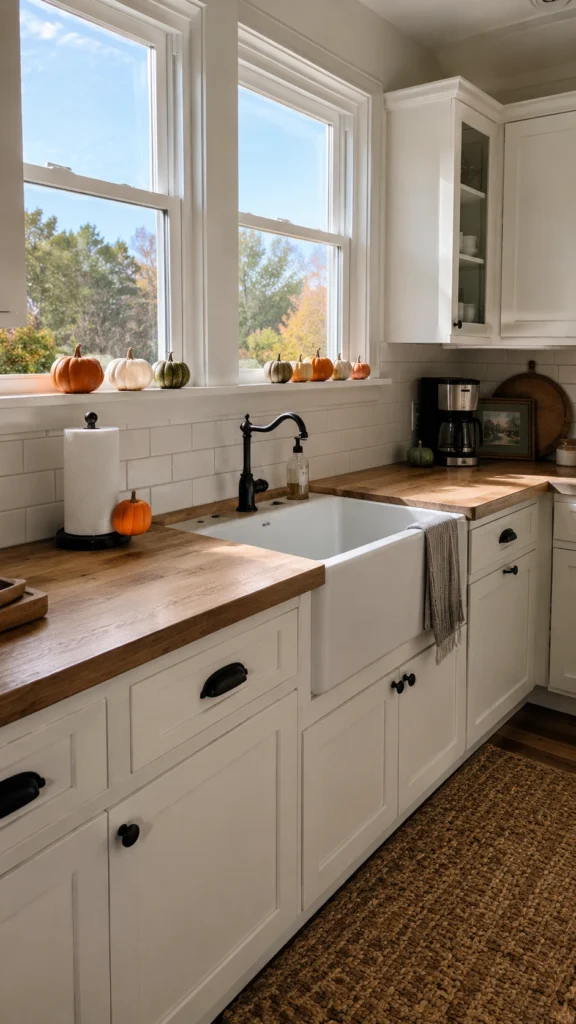
Every kitchen has awkward gaps, the six inches beside the sink, the dead spot on the windowsill, and mini pumpkins exist to fill them. Group them in odd numbers: three by the sink, five along the sill, one on the paper towel holder. Real ones last four to six weeks indoors, so an early-October purchase makes it to Halloween.
Mix white, orange, and green varieties. A pile of identical orange pumpkins looks like grocery overflow, while mixed tones look chosen. The other advantage is storage, or rather the lack of it. Compost them in November and buy fresh next fall.
19. Dress Up Lanterns as Glowing Ghosts
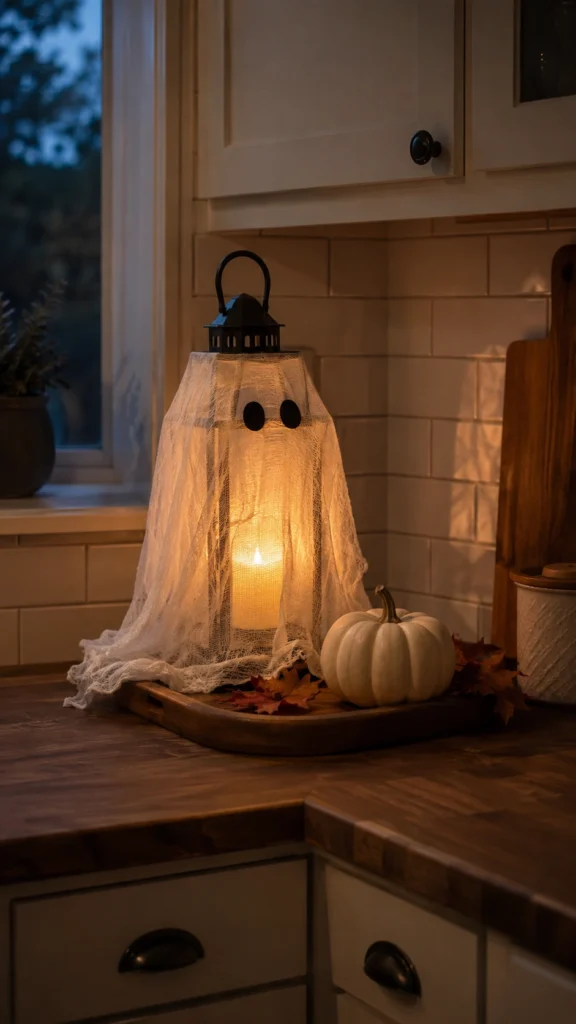
Any lantern you already own becomes a ghost with one package of cheesecloth. Drape the fabric loosely over the top, glue on two black felt circles for eyes, and drop a flameless candle inside so the whole thing glows from within after sunset.
Place one on the counter corner farthest from your prep zone and another near the doorway. Corners keep the loose fabric away from your workspace while still lighting the room’s edges. Built from dollar-store parts, each ghost costs about $4.
20. Cluster Candles at Staggered Heights
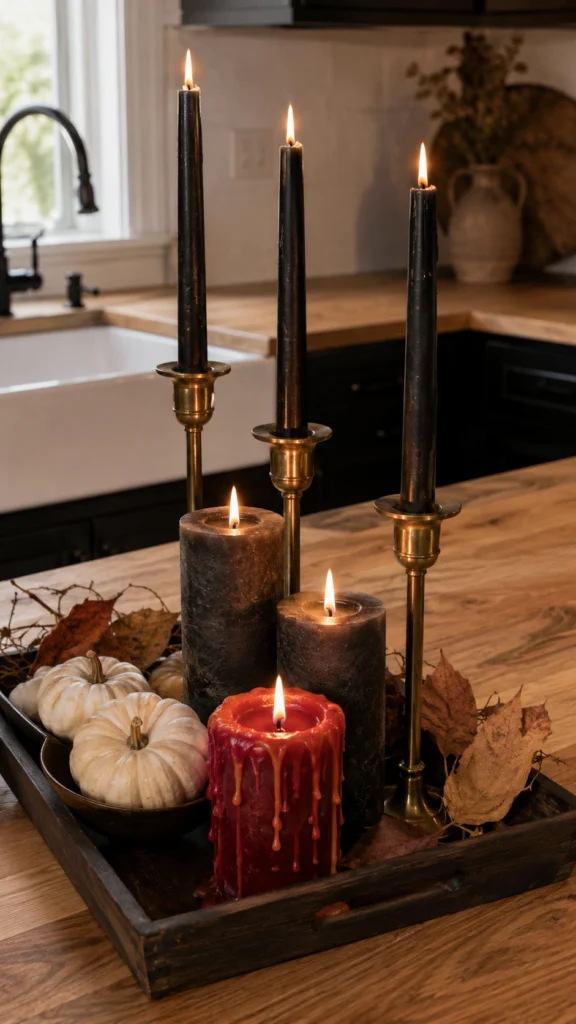
One grouped candle arrangement does more for atmosphere than five decorations scattered around the room. Cluster black tapers in brass holders, a fat pillar, and one or two drippy “bleeding” candles on a shared tray. The staggered heights pull the eye upward and look dramatic even unlit.
The tray is the part people skip, and it’s the part that matters. Candles on one surface read as an arrangement. The same candles spread across the counter read as forgotten. Keep the drip candles on a rimmed tray only, well away from cabinets, because that red wax stains wood and grout permanently.
21. Lean a Rustic Halloween Sign Against the Backsplash
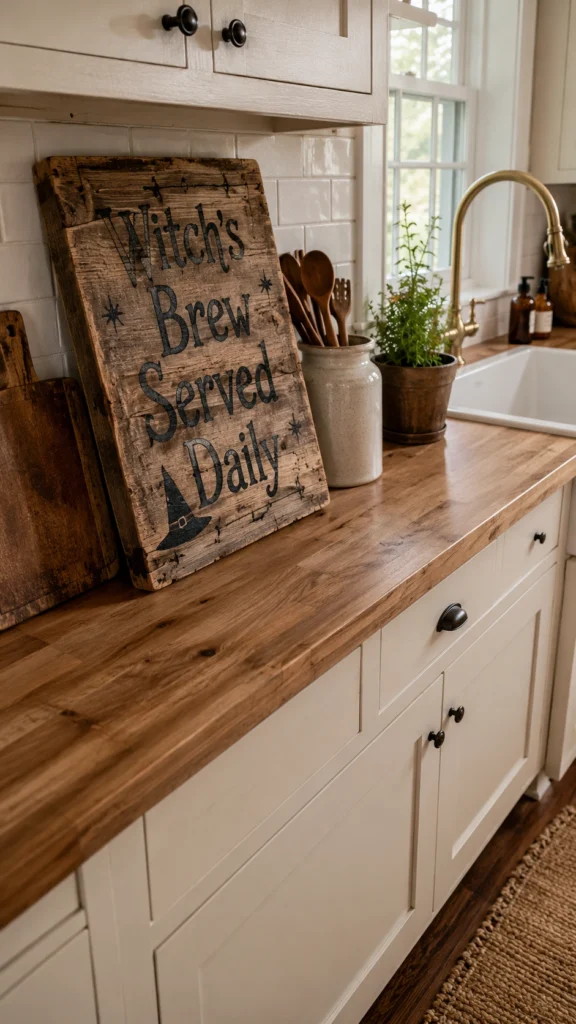
“Witch’s Brew Served Daily” leaned against the backsplash fits a farmhouse kitchen without a single other change. Weathered wood signs blend into rustic decor you already have, which is exactly why they work.
Two signs is the ceiling. Word-based decor multiplies quietly, and a kitchen with six signs starts reading like a gift shop. To make one look native to the space rather than newly purchased, match its wood tone to something already in the room, like your cutting boards or shelf brackets.
22. Prop a Cinnamon Broom in the Corner
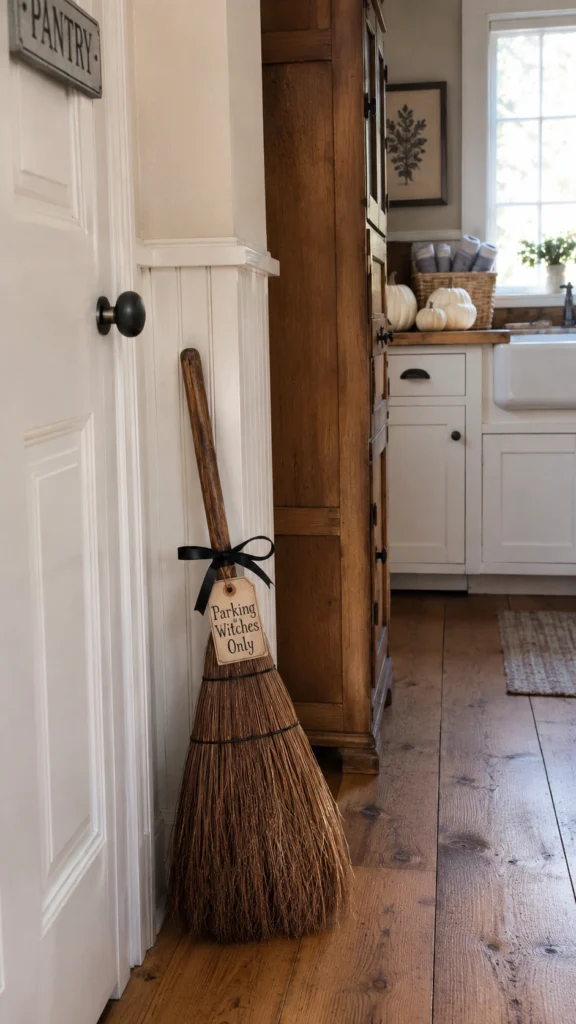
A cinnamon broom from the grocery store, leaned in the kitchen corner, suggests a witch stepped out mid-errand. It also scents the whole room, which no other item on this list can claim. Tie a black ribbon or a small “Parking for Witches Only” tag around the handle.
Beside the pantry door or next to the fridge keeps it visible but out of foot traffic. The scent fades after a few weeks, though a few drops of cinnamon essential oil on the bristles brings it back.
23. Turn Spice Jars Into a Potion Apothecary
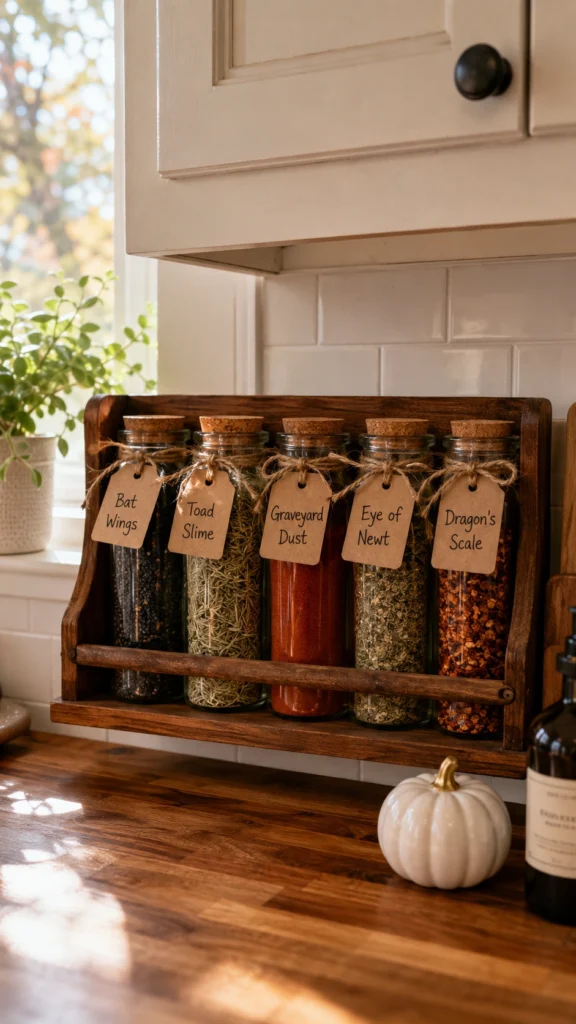
Relabel a row of glass jars with names like “Bat Wings,” “Toad Slime,” and “Graveyard Dust,” and your spice rack turns into a witch’s apothecary. Printable label sets run a few dollars on Etsy, or hand-write tags on kraft paper for the crooked, homemade look.
Fill the jars with real ingredients that match the color: black sesame seeds, dried rosemary, paprika. Guests genuinely lean in and read every one. Just label a separate display set rather than covering the spices you cook with daily. Mystery paprika in December helps no one.
24. Run Orange String Lights Under the Cabinets
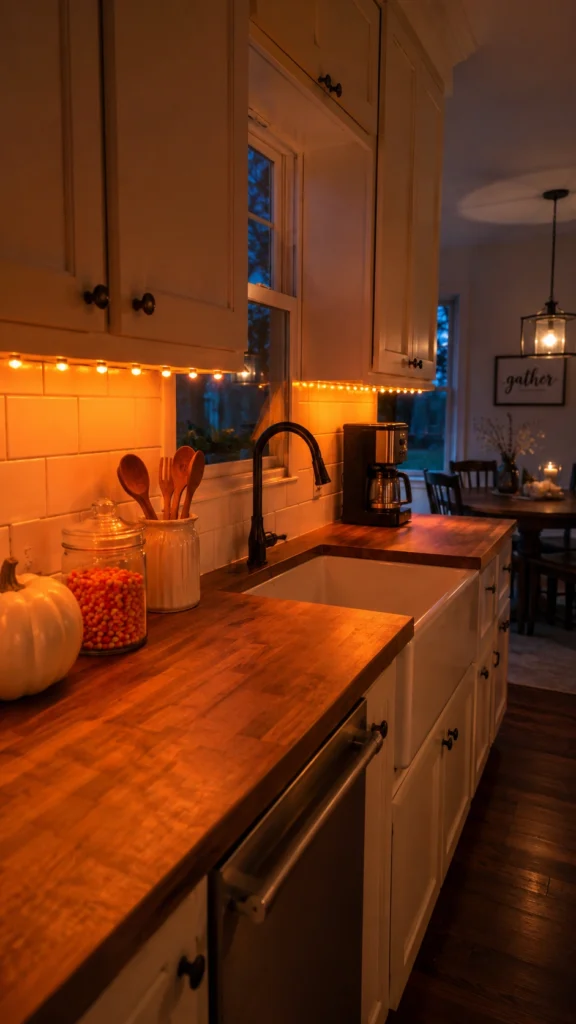
Here’s the upgrade I’d recommend to anyone hesitating over where to start. Orange LED string lights run under the upper cabinets with adhesive clips wash the counters in a warm pumpkin glow every evening, for around $10. Hide the battery pack behind the coffee maker, and pick a pack with a timer so the lights handle themselves.
Choose steady-glow mode over blinking. A flashing kitchen feels less haunted manor and more roadside diner with electrical problems.
Final Thoughts
You don’t need all 24. Three to five ideas that match your kitchen’s existing style will carry the whole season. A farmhouse kitchen leans naturally toward the rustic signs, cinnamon broom, and mini pumpkins. A moodier space calls for black lace, staggered candles, and the cauldron swap.
If you want a simple formula: one functional piece like the cookie jar or potion spice jars, one lighting element for evening, and one surprise like the peeking skeleton. That covers daytime charm, nighttime mood, and a guaranteed laugh from guests.
Shop in late September if you can, before the good cauldrons and cookie jars disappear. But if it’s already October and you’re starting from zero, drape a Halloween towel over the oven handle tonight. It takes ten seconds, and it’s the first step the rest of the room follows.
FREQUENTLY ASKED QUESTIONS
When should you put up Halloween kitchen decor?
Late September to the first week of October gives you the best value. You get a full month of enjoyment while stores still carry full stock. By mid-October, the good cookie jars and cauldrons are gone.
How do you decorate a small kitchen for Halloween?
Swap instead of add. Replace your utensil crock with a cauldron, trade everyday dish towels for Halloween ones, and use vertical surfaces like windows and cabinet fronts for bats and decals. Your counters stay clear, and the room still reads fully decorated.
Is Halloween decor safe around food prep?
Yes, with two rules. Keep fabric, webbing, and paper decorations away from the stove and rising steam, and use flameless candles anywhere near your prep zone. Anything that touches food, like themed platters and cutting boards, should be food-safe ceramic or wood.
How much does it cost to decorate a kitchen for Halloween?
$30 to $75 covers it well. Dish towels, mini pumpkins, paper bats, and printable labels handle most of the room for under $40. Statement pieces like a haunted house cookie jar add $25 to $40 each, so pick one or two rather than five.
How do you store Halloween kitchen decor after October?
Wrap the ceramics in the dish towels you bought, so both items share one bin. Flatten paper garlands and bats inside a folder, and compost the real pumpkins. One medium plastic tote holds everything on this list.