
Three weeks before your Halloween party, the living room still looks the way it did in July, and every setup Pinterest shows you seems to need $300 in craft supplies and a spare garage. You don’t need either. A weekend, a modest budget, and a short list of smart Halloween party decor ideas will get you a party people still bring up at Thanksgiving. The 20 ideas below cover everything from the front porch to the dessert table, with real prices and shortcuts, so you can pick what fits your space and skip the rest.
How to Choose the Right Halloween Party Decor Ideas for Your Space
Take five minutes to plan before you buy anything. Most decorating disasters start with grabbing random items, then realizing at home that nothing matches. A few quick decisions save you money and a return trip.
Start with these questions:
- Where will guests actually gather? Decorate the kitchen, the drink station, and the main seating area first. Nobody notices the guest bedroom.
- Cute or creepy? Friendly ghosts and painted pumpkins suit family parties. Cobwebs, skulls, and dim lighting suit adult ones. Mixing both usually looks confused.
- What’s your real budget? Set a number before you shop. Most ideas below cost under $25, and several come in under $10.
- How much time do you have? Some projects need a weekend of drying time. Others take ten minutes the morning of the party.
Answer those, pick your favorites from the list, and skip the rest without guilt.
1. Decorate Your Table With Charming Pumpkin Centerpieces
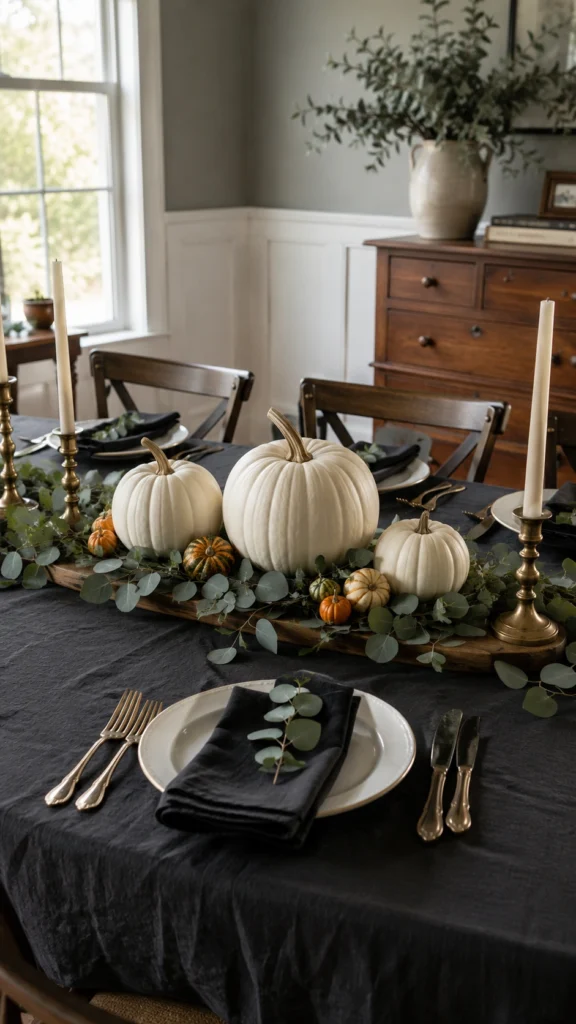
Pumpkins anchor almost any Halloween tablescape because they work at every price point. Grab three or four in mixed sizes, cluster them in the center of the table, and tuck eucalyptus stems or mini gourds around the base. Odd numbers look more natural than pairs, so stick with three or five per grouping.
White pumpkins photograph better on dark tablecloths, and classic orange pops against white linens. Match the pumpkin to the backdrop, not the other way around, and the table reads planned instead of thrown together.
Want a centerpiece that looks like it came from a florist? Hollow out a medium pumpkin and drop a mason jar of fresh flowers inside. Total cost sits around $6.
2. Create Festive Halloween Chalkboard Signs
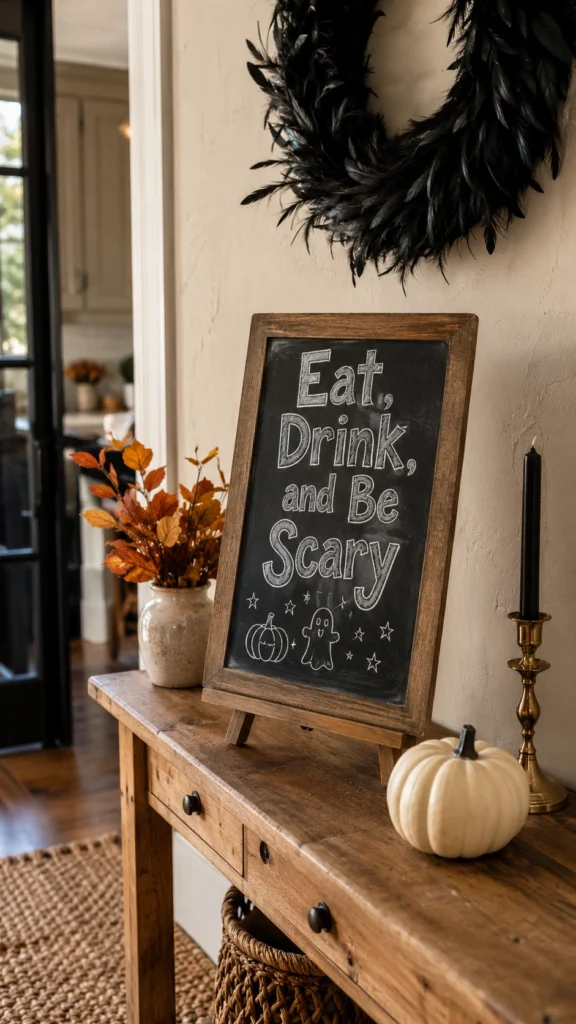
A chalkboard sign earns its keep twice. It decorates, and it points guests toward the drinks, the snacks, or the bathroom. A small chalkboard easel from a craft store runs about $10. Write something punny like “Eat, Drink, and Be Scary” in chunky lettering and you’re done.
If your handwriting shakes, print a font you like, rub chalk on the back of the paper, and trace over the letters. The chalk transfers a faint outline you can fill in, and the finished sign looks hand-lettered by someone with far steadier nerves.
3. Paint Pumpkins With Creative Halloween Designs
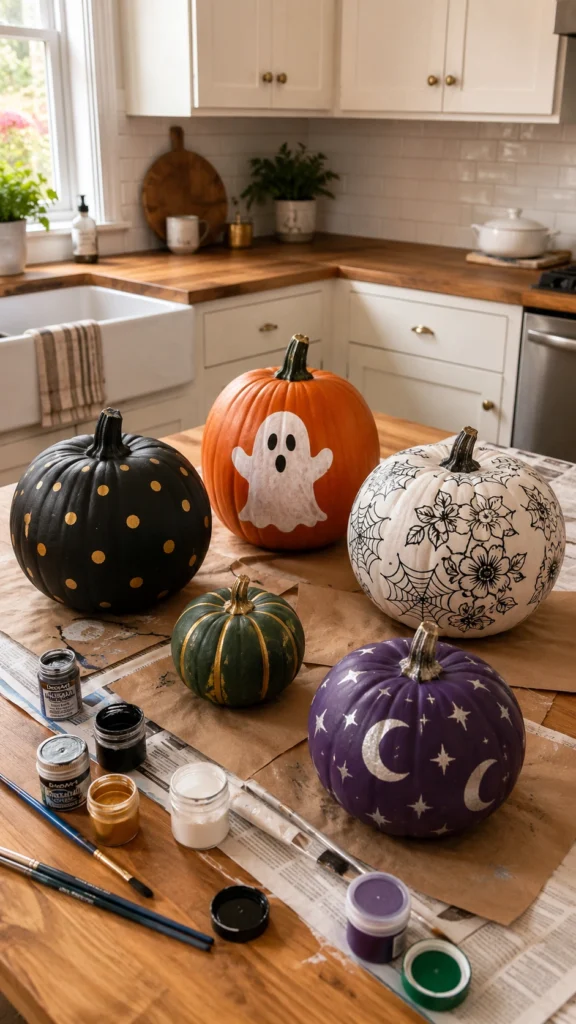
Painted pumpkins beat carved ones for parties for one practical reason: they last for weeks instead of days. A carved pumpkin starts collapsing after about five days, which matters if you decorate early. Acrylic craft paint sticks well to pumpkin skin and costs about $1 a bottle.
Matte black pumpkins with gold polka dots read modern. Simple white ghost faces on orange pumpkins read classic. If kids are coming to the party, painting also lets them join the prep without any knives involved.
4. Build the Ultimate Halloween Party Playlist
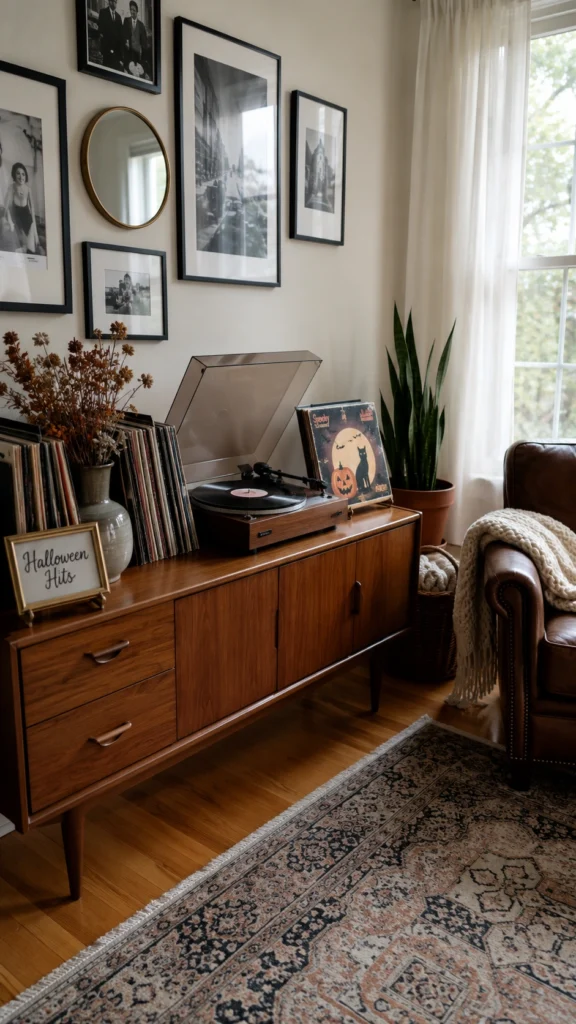
Decor sets the scene, but music sets the mood, and silence kills a party faster than an empty snack table. Build the playlist a week ahead so you’re not fumbling with your phone while guests arrive. Mix the obvious hits, “Thriller” and “Monster Mash” included, with atmospheric tracks and current songs so the whole thing doesn’t feel like a school dance from 1997.
One warning: spooky sound effects on loop get old in about ten minutes. Creaking doors and screams belong at the entrance only, not in the main room all night.
5. Craft Easy Spider Web Decorations
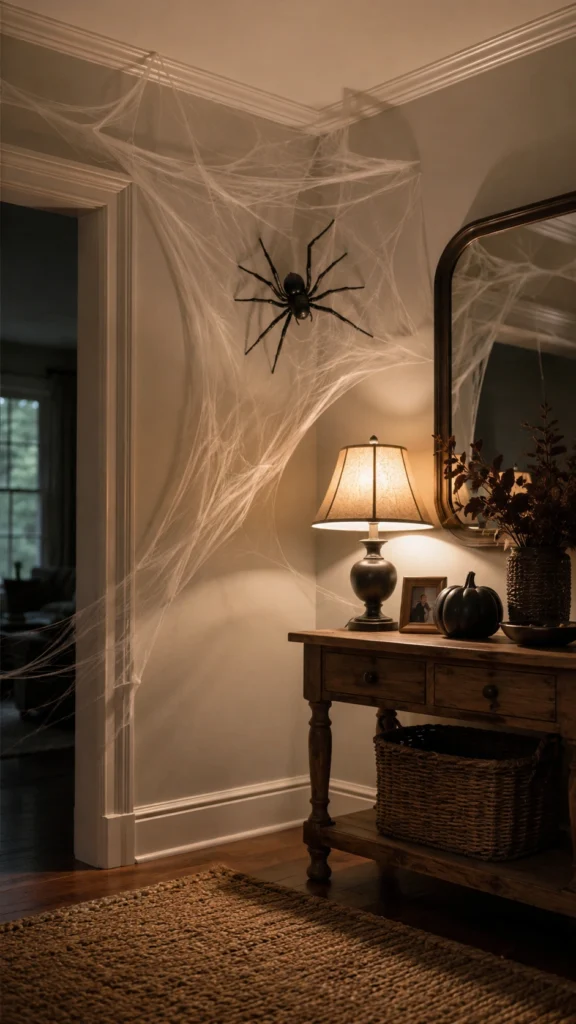
Stretchy spider web material costs about $3 a bag and covers a surprising amount of space. The whole trick is stretching it thin. Pull it until it looks wispy and almost transparent, then drape it across corners, railings, and mirrors. Thick clumps look like cotton balls, and in my experience, that’s the single fastest way to make cheap decor look cheap.
Add a few plastic spiders in different sizes. One big spider reads scarier than twenty tiny ones scattered around. Keep the webbing at eye level, on doorways and light fixtures, because that’s where guests actually look. Webbing on baseboards just collects dust and confuses the vacuum.
6. Style a Spooky Halloween Entrance
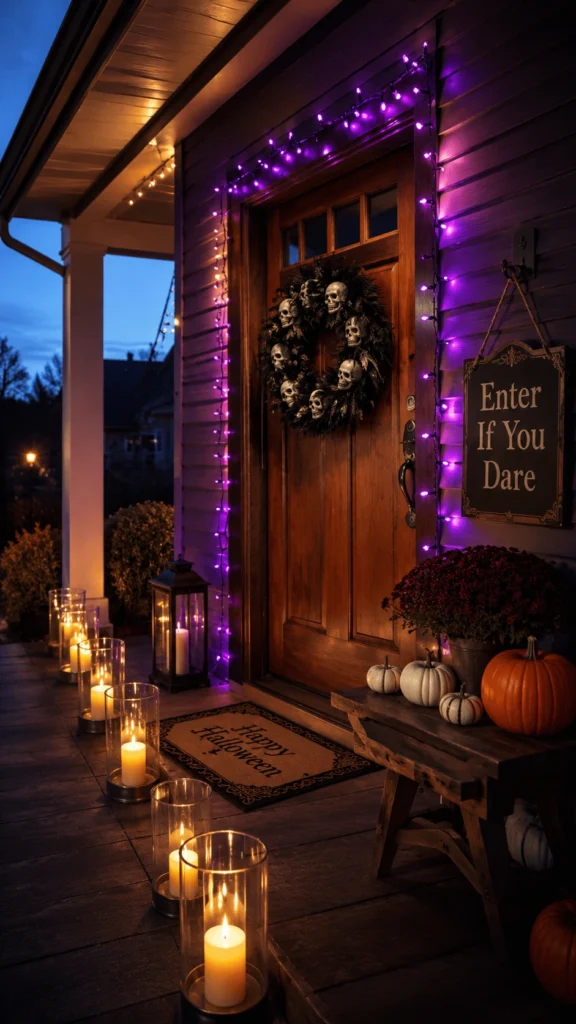
Your entrance tells guests what kind of night they’re in for before they ring the bell. Line the walkway with lanterns or LED candles, hang a wreath with black feathers or mini skulls, and add an “Enter If You Dare” sign near the door.
Short on time or cash? A single strand of purple string lights around the door frame costs under $10 and signals “party here” the moment guests pull up.
7. Make Creepy Edible Eyeball Treats
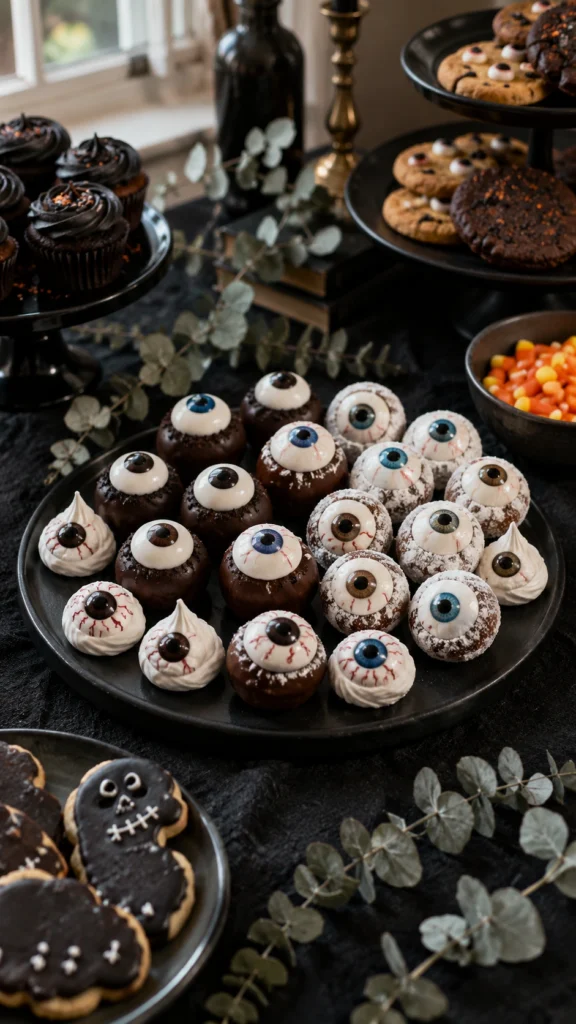
Food counts as decor when it looks this weird. Press a candy eyeball into a doughnut hole, stick a frosted eye on a truffle, or float lychee “eyeballs” stuffed with blueberries in the punch. The lychee version works especially well because the texture genuinely unsettles people, in the best way.
Serve them on a dark platter so the white pops. Guests will photograph them before eating them. And if you have no time to bake, a $4 bag of candy eyeballs from the baking aisle turns store-bought brownies, cookies, and cupcakes into party food in about two minutes.
8. Set Up a Halloween Snack Table Everyone Will Love
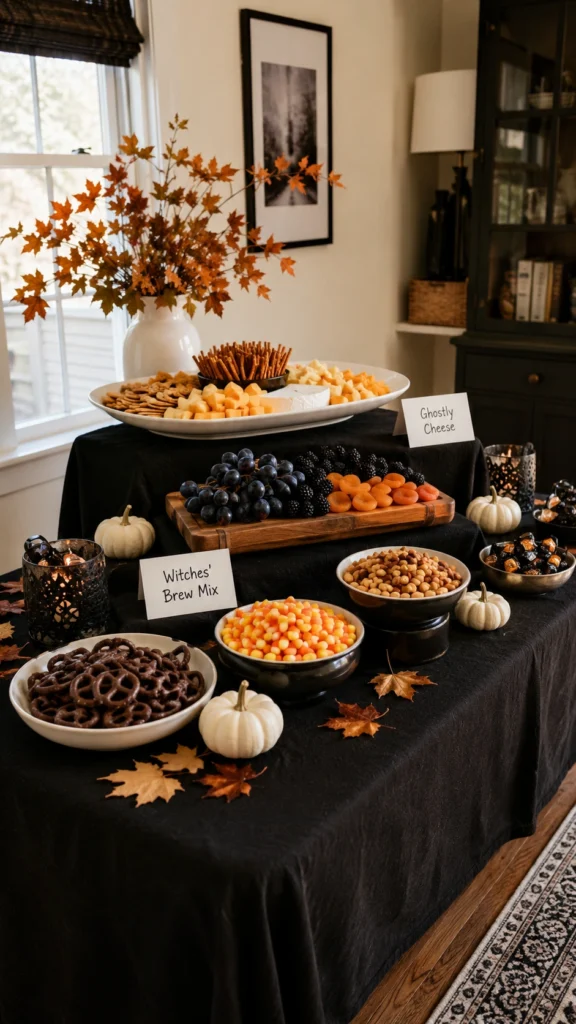
A great snack table needs height variation more than it needs more food. Stack sturdy boxes under the tablecloth to create risers, then place platters at different levels. Flat tables look sparse even when they’re full, while layered tables look abundant even when they’re not.
Stick to orange, black, and white so the spread reads intentional. Label everything with small tent cards, especially dishes with nuts or other common allergens. Guests with food restrictions will quietly appreciate it all night.
9. Design a Fun Halloween Photo Booth
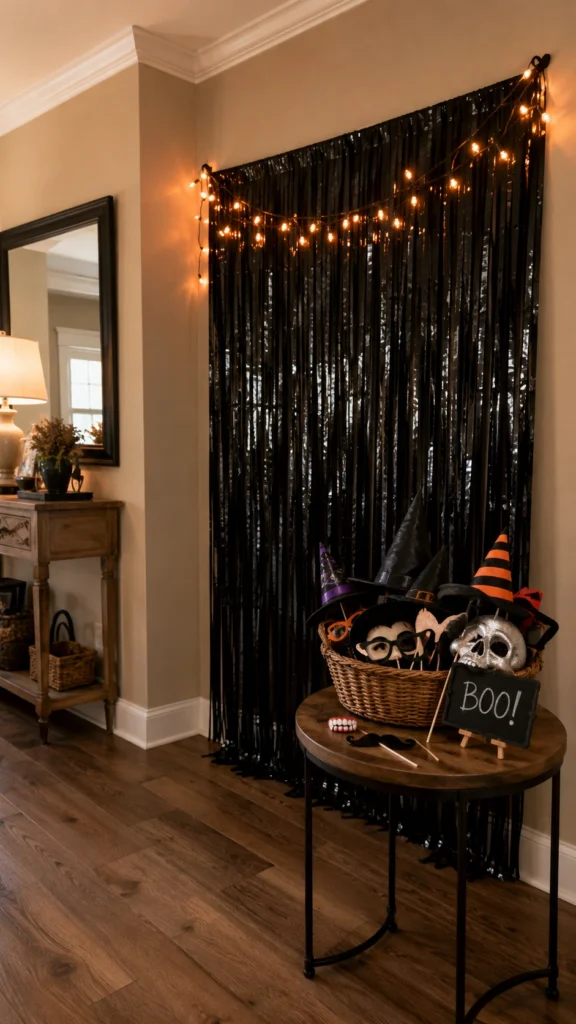
A photo booth keeps guests entertained without you lifting a finger after setup. Hang a black plastic tablecloth or fringe curtain against a wall, add a string of orange lights, and set out props: witch hats, plastic fangs, oversized glasses.
Placement matters more than props. Dark backdrops eat light, so put the booth near a lamp rather than in a dim hallway, or every photo comes out blurry. Keep it out of high-traffic paths too. Nobody poses when people keep walking through the frame, so a corner away from the food line works best.
10. Make Glowing Halloween Fairy Light Jars
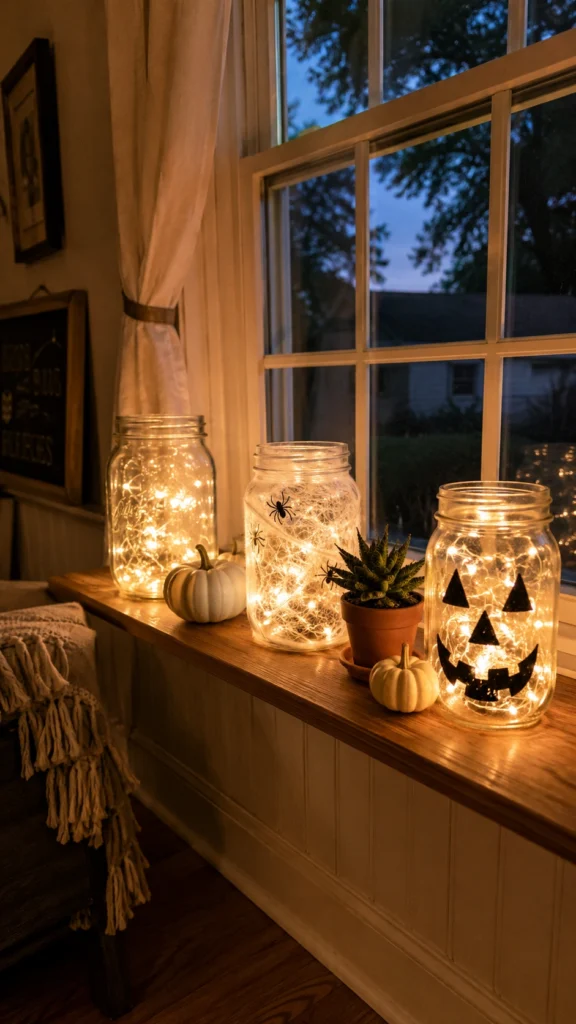
If I could only pick one item from this whole list, it would be this one. Fairy light jars give you a warm, magical glow with no open flames near costumes made of polyester, and they take about a minute each. Stuff a strand of battery-powered fairy lights into a mason jar, done. For extra atmosphere, stretch a thin layer of spider web over the glass first, or draw a jack-o’-lantern face on the outside with a paint pen.
A 10-pack of battery fairy light strands runs about $12 online. Scatter the jars along stairs, windowsills, and the bar.
11. Decorate With Budget-Friendly Thrift Store Finds
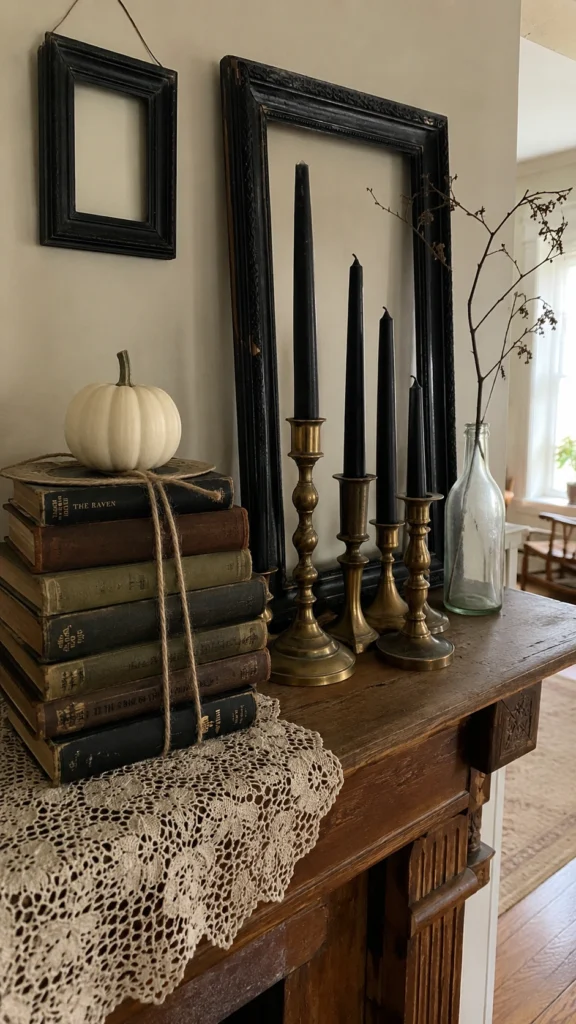
Thrift stores fill up with useful pieces every October. Look for brass candlesticks, old picture frames, lace tablecloths, and glass bottles. A $2 brass candlestick holding a black taper looks gothic and expensive. Spray-paint mismatched frames black, remove the glass, and hang them empty for a haunted gallery wall.
Thrifted decor often beats new store-bought pieces because age reads as authenticity. A genuinely worn candlestick looks haunted in a way a shiny plastic replica never will, and it costs less. While you’re there, grab a few old hardcover books. Stacked and tied with twine, they make instant spellbook props for shelves and tables, usually for under a dollar each.
12. Transform Your Party With Halloween Balloons
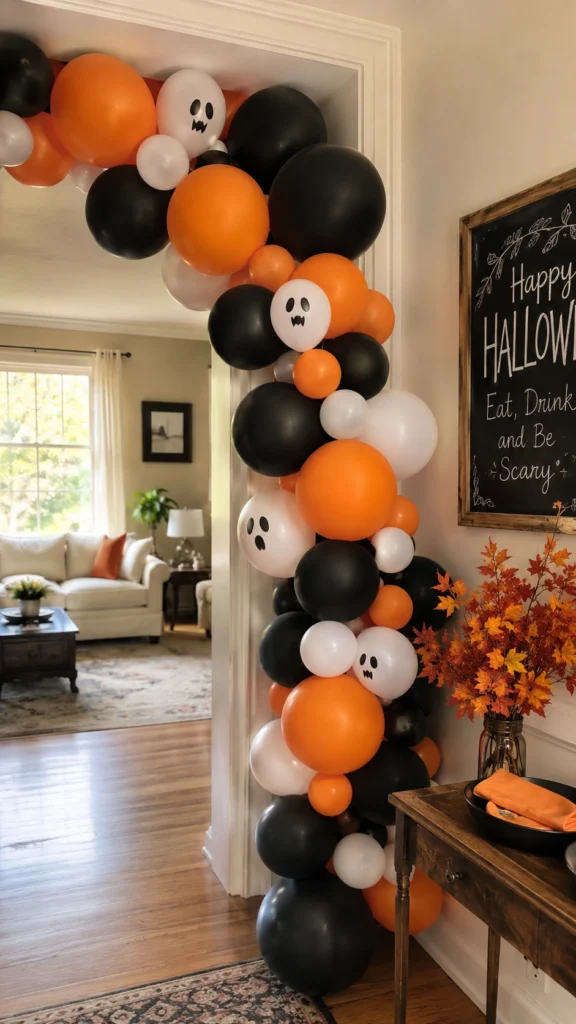
Balloons might sound like birthday territory, but a black and orange balloon garland changes an entire room for around $20. Buy a garland kit with mixed sizes, inflate everything the morning of the party, and drape it over a doorway, mantel, or the snack table.
Mix in a few white balloons with drawn-on ghost faces for personality. Garlands hold up fine overnight, so assemble yours the day before if party day looks tight.
13. Hang Ghost-Inspired Fabric Decorations
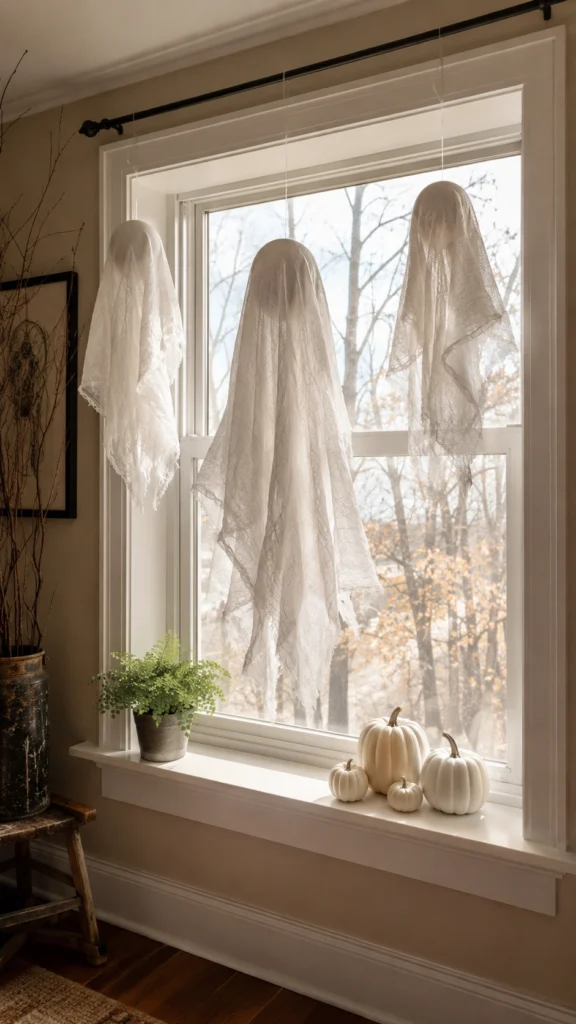
Cheesecloth ghosts cost almost nothing and look genuinely eerie. Drape cheesecloth over an inflated balloon or a foam ball on a stand, spray it with fabric stiffener, and let it dry overnight. Pop the balloon and the fabric holds its ghostly shape on its own.
Hang a few at different heights near a window where a breeze can reach them, because movement sells the effect. A still ghost is a prop; a swaying one changes the whole room. One yard of cheesecloth costs around $3 and makes two ghosts, so a full haunted window display costs less than a coffee order.
14. Create a Handmade Halloween Garland
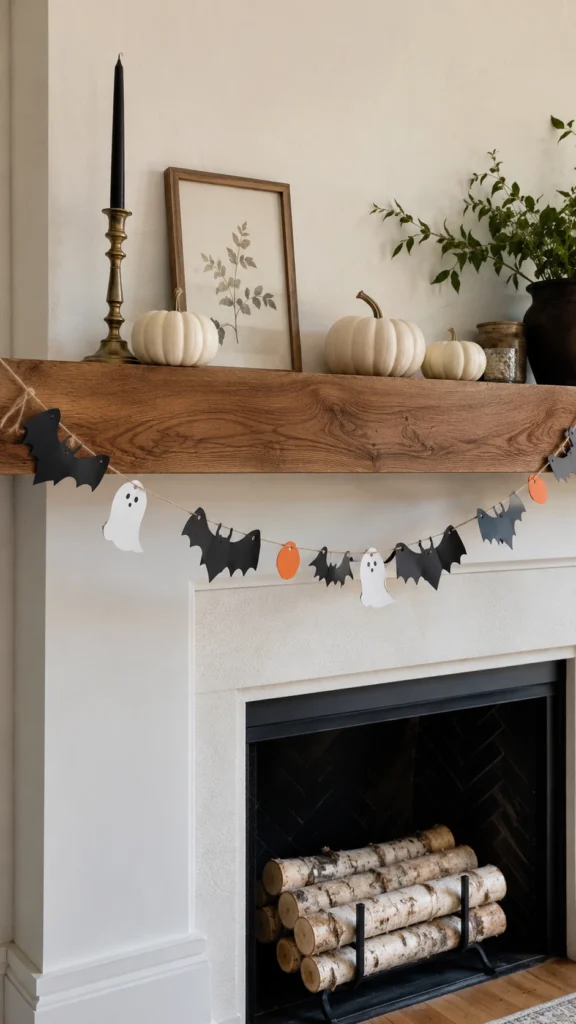
A handmade garland gives your mantel or doorway a custom look for the price of paper and string. Cut bats, ghosts, or pumpkins from black and orange cardstock, punch a hole in each, and thread them onto twine. Twenty shapes across six feet of twine takes maybe 30 minutes. In a hurry, buy felt shapes from the craft store and hot-glue them on instead.
Renters, this one’s for you. Garlands hang from removable hooks and leave zero wall damage, which matters when the deposit is on the line.
15. Design a Stunning Halloween Grazing Table
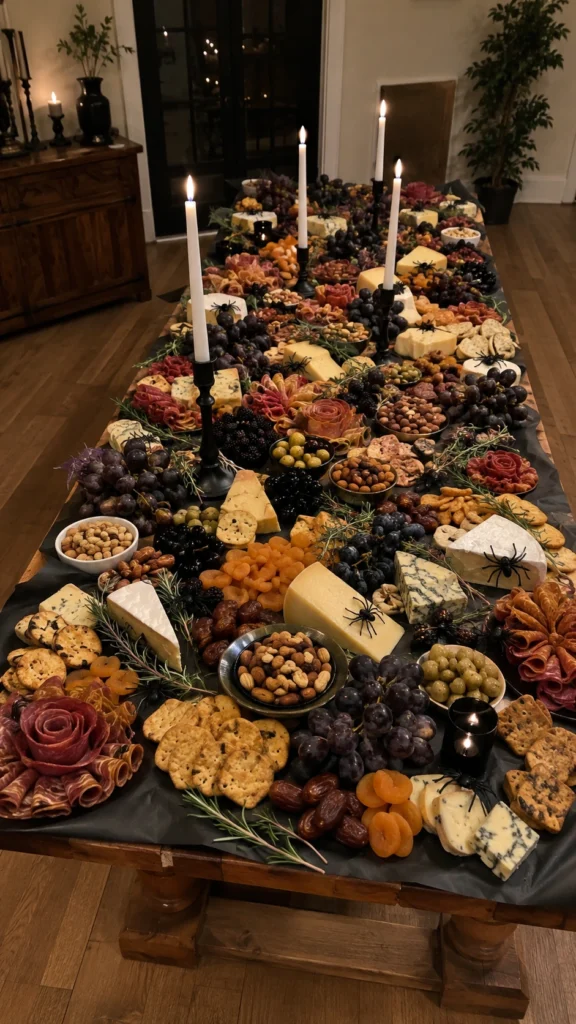
A grazing table turns the food spread into the centerpiece of the whole party. Cover a long table with parchment or a dark cloth, then build clusters: cheeses on one end, charcuterie folded into rose shapes, dark grapes, blackberries, crackers, and nuts filling every gap. Leaving no empty space is exactly what makes grazing tables photograph so well.
Add plastic spiders on the cheese, rosemary sprigs, and a few black candlesticks. Budget roughly $60 to $100 for a table that feeds 15 people, and keep hot foods off it entirely. Everything should hold at room temperature for two to three hours so you’re not babysitting the table all night.
16. Create a Magical Halloween Potion Drink Station
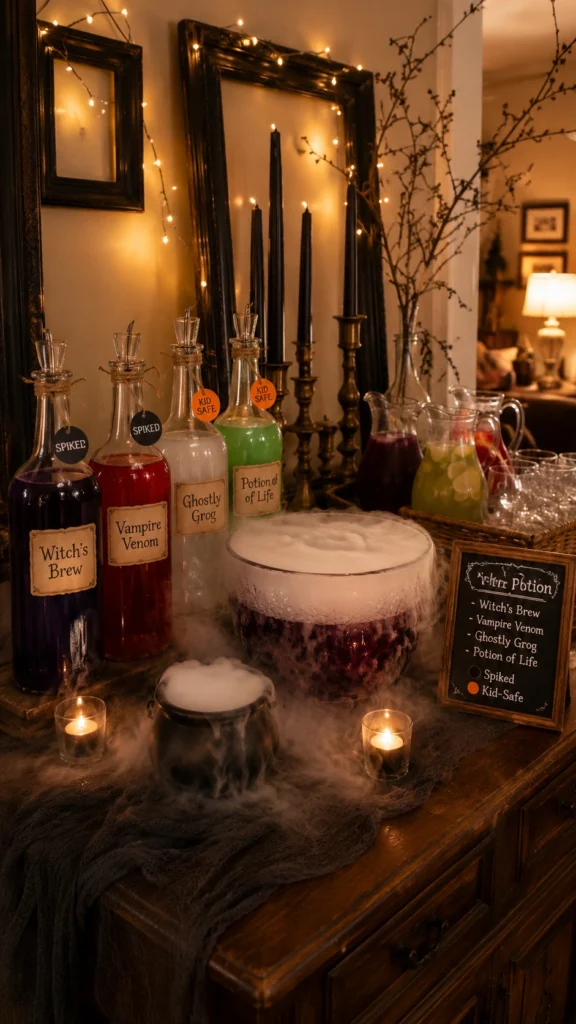
A potion station turns basic drinks into an experience. Collect glass bottles in different shapes, fill them with juices and mixers, and label each with an aged-paper tag reading “Witch’s Brew” or “Vampire Venom.” Tea-stain the labels for an old apothecary look.
Dry ice in a punch bowl makes great fog, but keep it in a separate vessel guests can’t reach into. Dry ice burns skin on contact, so let the fog do the show while the ice stays out of cups. Clearly mark which bottles contain alcohol too. A simple color code, black tags for spiked potions and orange for kid-safe ones, prevents awkward surprises halfway through the night.
17. Build an Eye-Catching Halloween Candy Wall
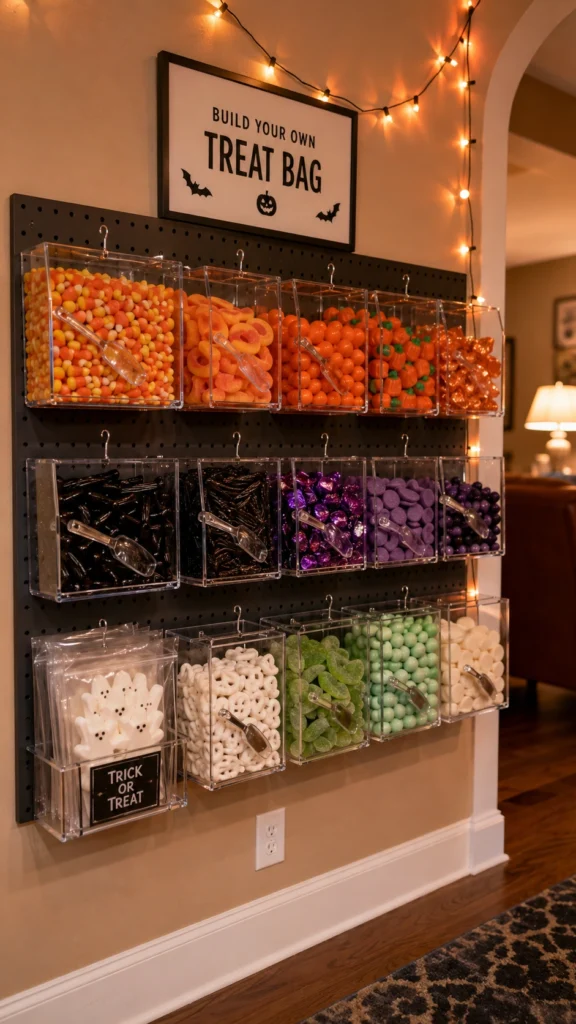
Candy walls started as a wedding trend, and the idea works even better at Halloween. Mount clear acrylic bins or hang small buckets on a pegboard, fill each with a different candy, and set out treat bags so guests build their own mix. One project, three jobs: decor, activity, and party favor.
Sort candy by color for the biggest visual punch. A wall of orange, black, purple, and green sections looks intentional instead of chaotic. Buy in bulk right after October 1st when stores stock up, and expect to spend $30 to $50 depending on your guest count. Set out small scoops so nobody digs in bare-handed.
18. Hang Floating Ghost Decorations From the Ceiling
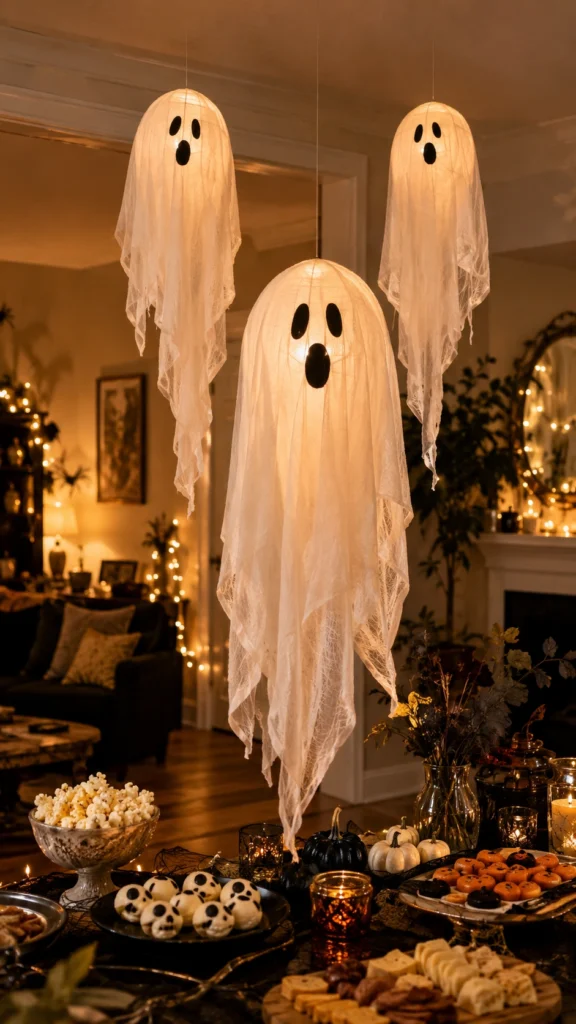
Most parties ignore the vertical space, and floating ghosts fill it. Drape white fabric or cheesecloth over paper lanterns, draw simple faces with a marker, and hang them from the ceiling with clear fishing line at varying heights. The invisible line creates the floating illusion, and the uneven heights keep it from looking like a store display.
Cluster three to five ghosts over the snack table or dance area rather than spreading singles around the room. Groupings always read more dramatic than scattered pieces.
19. Create a Haunted Bakery-Inspired Dessert Display
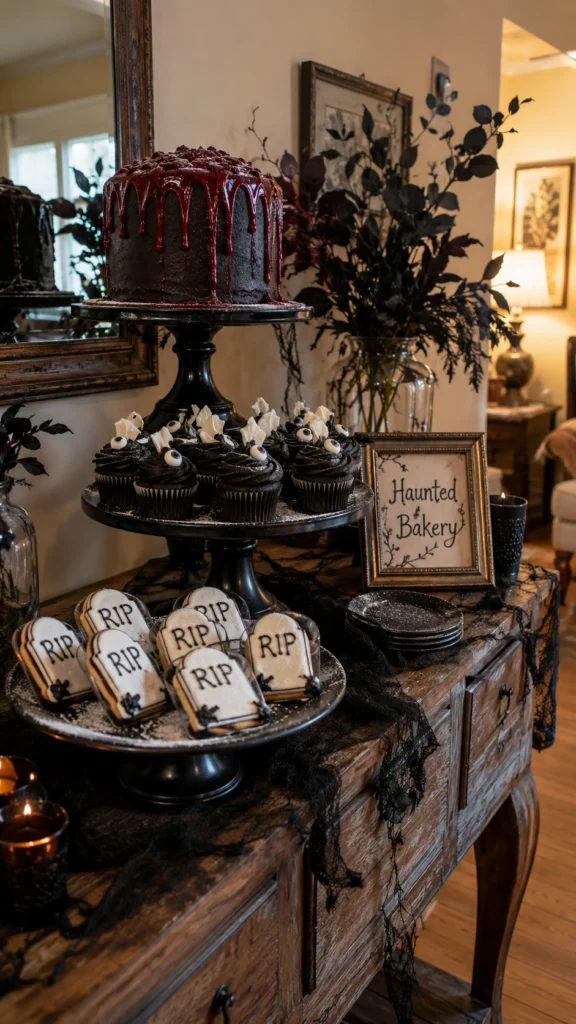
Give your desserts a haunted bakery theme: tiered stands, black frosted cupcakes, cookies shaped like tombstones, and a cake dripping with red ganache “blood.” Dust everything with powdered sugar for a cobwebbed, abandoned look.
Vintage cake stands from thrift stores, painted black, complete the display for a few dollars each. A handwritten “menu” card in a small frame next to the desserts sells the bakery concept without any extra effort.
20. Transform Your Backyard Into a Cozy Halloween Retreat
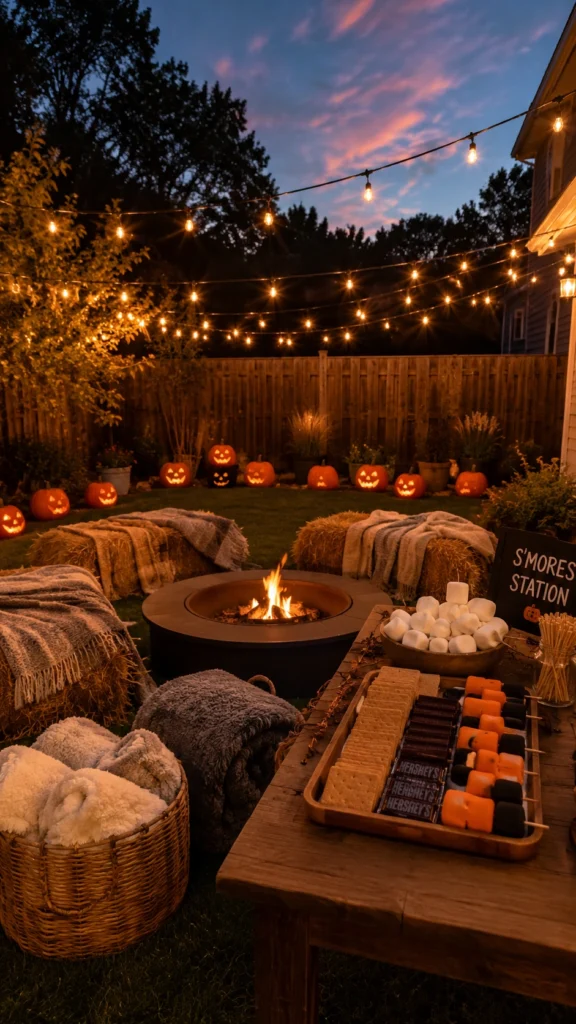
If your guest list outgrows the living room, take the party outside. String cafe lights overhead, arrange hay bales or blankets around a fire pit, and set up a s’mores station with Halloween-colored marshmallows. A few carved pumpkins with LED candles along the fence line give the yard a warm perimeter glow.
October weather changes fast, so check the forecast three days out and keep a backup plan. A pop-up canopy with string lights inside saves an outdoor party from a surprise drizzle. Set out a basket of cheap fleece blankets near the seating too. Guests stay outside twice as long when they’re warm, and the stacked blankets double as decor until someone claims them.
Wrap Up Your Spooky Bash Planning
You now have 20 Halloween party decor ideas ranging from five-minute fixes like spider webs and fairy light jars to statement pieces like grazing tables and candy walls. You don’t need all 20. Pick three or four that match your space, your budget, and your energy, and do those well. A party with one great photo booth and a killer snack table beats a party with fifteen half-finished projects every time.
Start with the entrance, since it shapes the first impression, then work inward toward the food and drink stations where guests spend most of the night. Give yourself a full weekend, rope in a friend, and let the setup become part of the fun. The best Halloween parties usually start a week early, with two people covered in paint and cheesecloth, laughing in the kitchen.
FREQUENTLY ASKED QUESTIONS
When should you start decorating for a Halloween party?
Start big projects like cheesecloth ghosts and painted pumpkins one to two weeks out, since some need drying time. Save fresh items like carved pumpkins, flowers, and food displays for the final one to three days. Balloon garlands hold up fine when assembled the day before.
How much should you budget for Halloween party decor?
You can decorate a full party space for $75 to $150 using the ideas above. Spend most of it on the areas guests see longest: the entrance, the snack table, and the drink station. Skip decorating rooms guests only pass through.
What’s the cheapest way to make a party feel decorated?
Lighting. Swap regular bulbs for orange or purple ones, add battery fairy lights in jars, and dim everything else. A $15 lighting change does more than $50 of scattered props under bright ceiling lights.
Can you reuse Halloween party decorations next year?
Most of them, yes. Painted pumpkins won’t survive, but garlands, balloon kits, fabric ghosts, thrifted candlesticks, and fairy lights all store flat in one bin. Label the bin by room so setup next October takes an hour instead of a weekend.
How do you decorate for both kids and adults at the same party?
Keep shared spaces cute-leaning with painted pumpkins, friendly ghosts, and the candy wall, then reserve one adult zone, like the potion drink station, for creepier touches and clearly labeled spiked drinks. Guests self-sort naturally when the zones are obvious.